


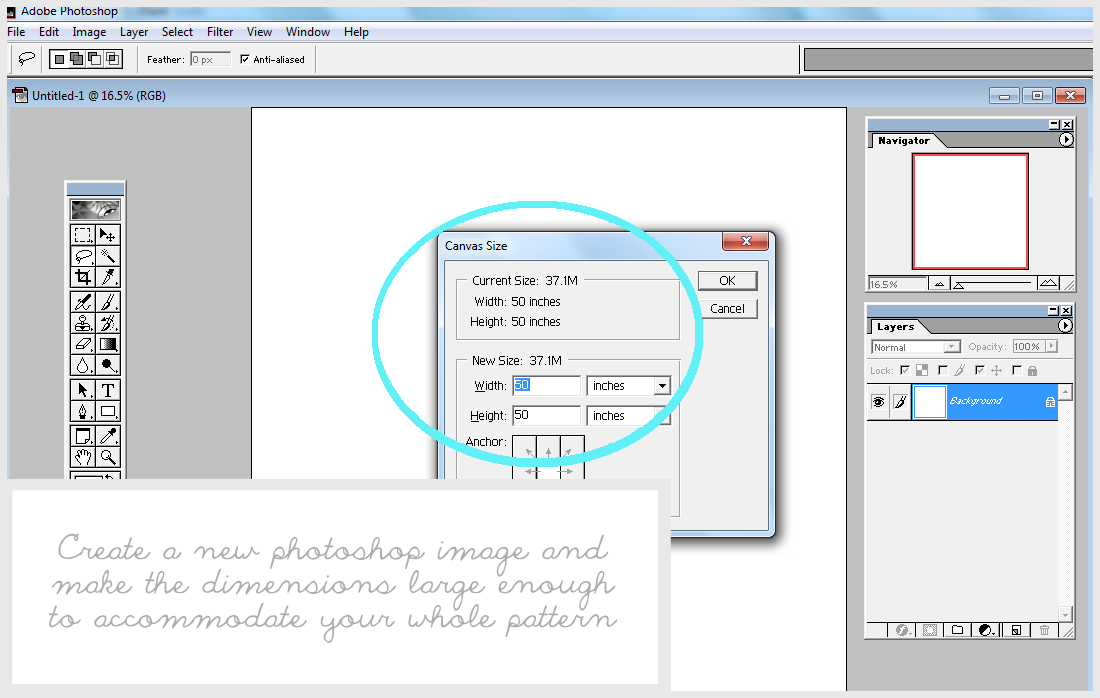
I wanted to share my method for creating digital sewing patterns. There is no need to spend a fortune of $500 on pattern making software. All you need is a bit of time and Photoshop!
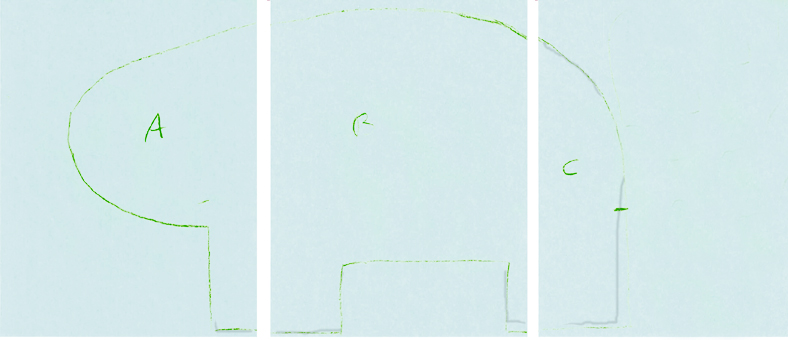
First, I cut up the pattern pieces too large to fit on a standard Printing Paper Page (8.5×11) Take the above photo as an example, I had to trace out one pattern piece onto 3 different pages because of it’s large size. How did I do this? I laid out the amount of pages the pattern piece would need & traced the pattern onto them. Simple.
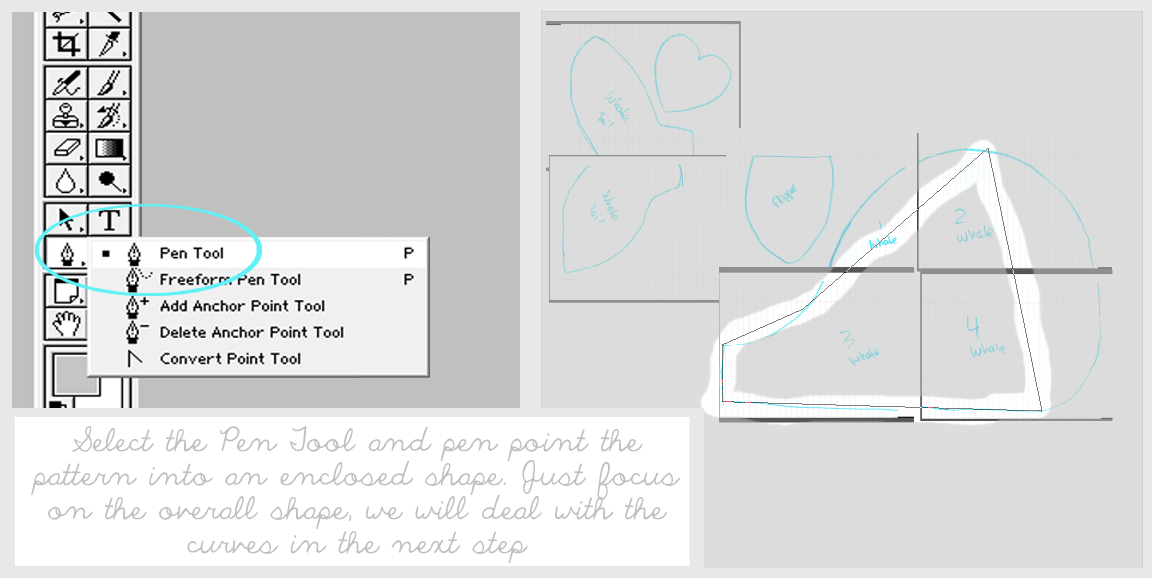
Following is how to digitize the above traced out pattern pieces.

I recommend making sure that your scanned pdf pages are saved to standard size (8.5×11)
The reason for doing this is to make sure that you are keeping your standard printing page size correct. Plus, working with smaller images in Photoshop is faster (it doesn’t freeze up as much!)
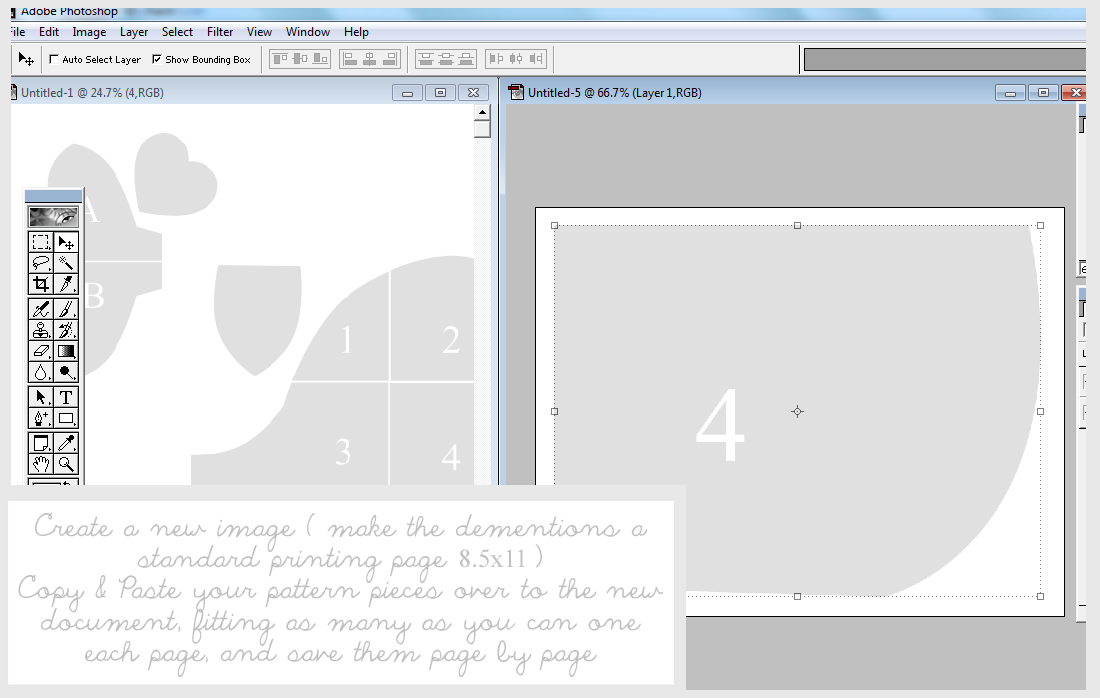
If you need an idea of how to do this, manually open each image into a new document in Photoshop, go to Image<Image Size<and then enter your new dimensions (8.5×11) and then copy and paste it into your larger canvas shown in the step below.


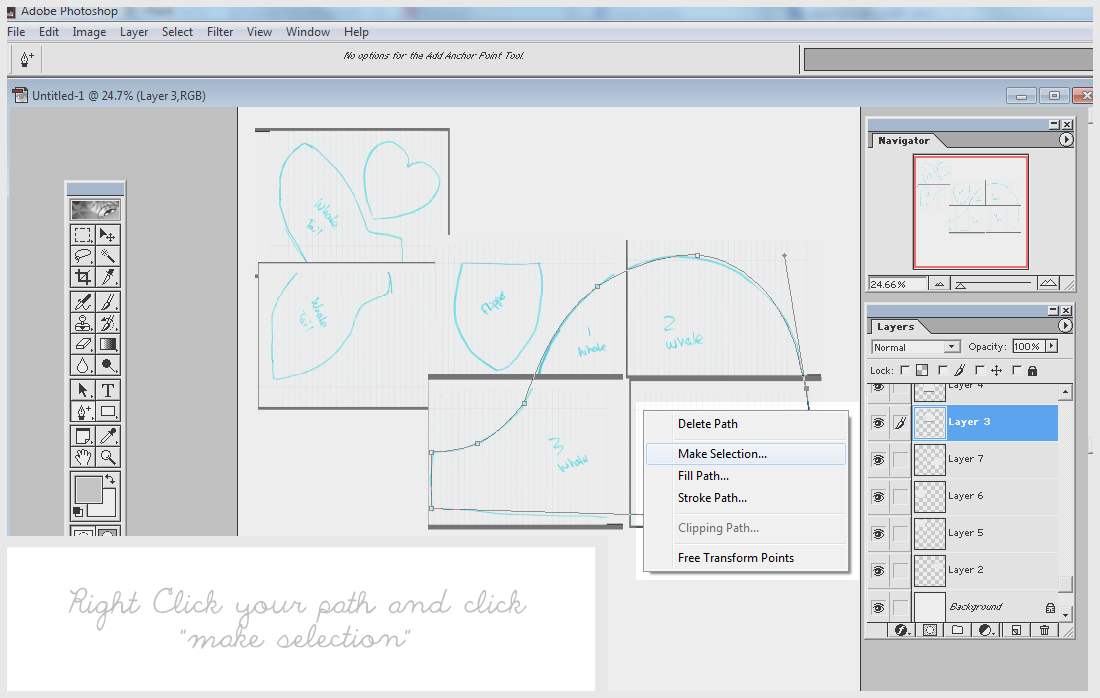
Focus on the Right Angles in the above step.


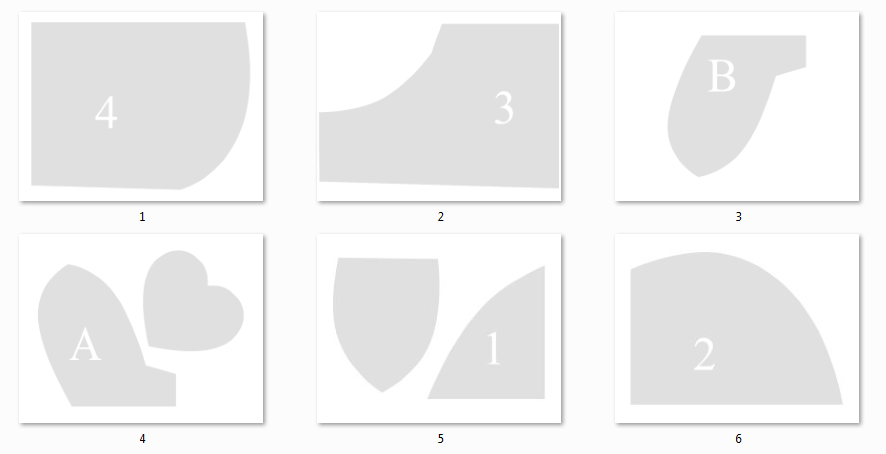
Repeat the above process with all of your pattern pieces.


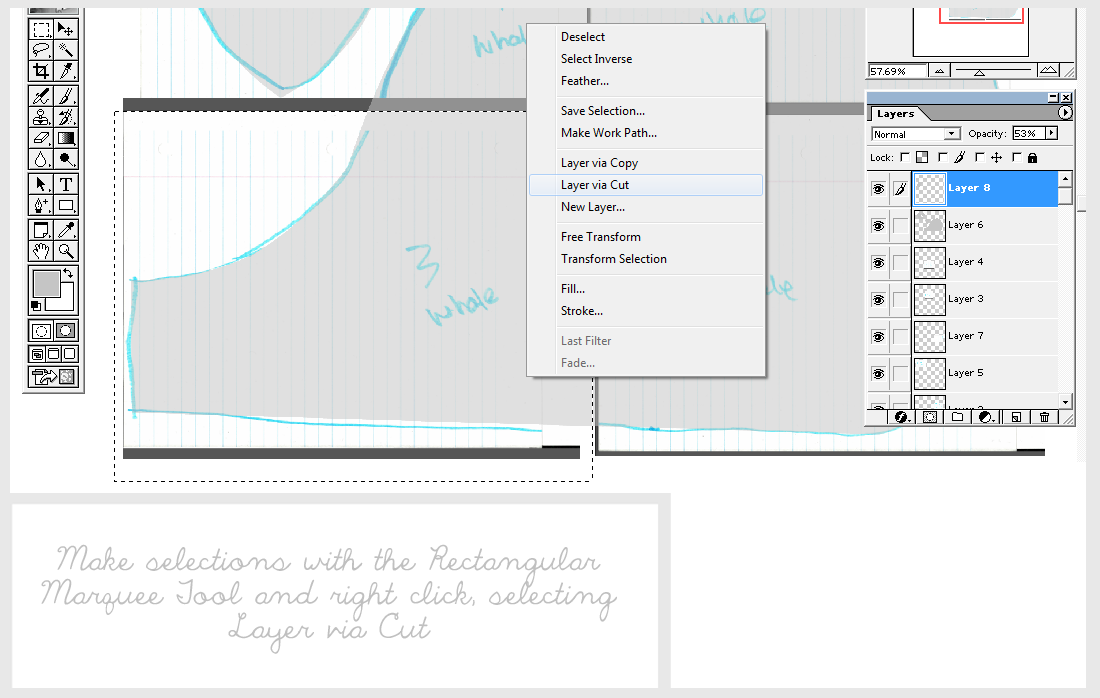
For the above step, we are now separating all of the pattern pieces into individual pages. To give you an idea of where to divide them, use the original page dimensions.

Other people probably do it differently, but this is the easiest (and cheapest) way I have found. It does takes a bit of time to get the hang of working with Photoshop to do this sort of thing, but you’ll become a pro in no time! It’s a great free way (if you have Photoshop) to digitize your patterns, whether it’s for selling them, or for web use like I use them.
If you have any questions, don’t hesitate to leave a comment below and ask!
Ps) Here is the link to the actual whale pattern featured in this tutorial. 🙂


Wow! This is great! It looks like it took a lot of work. Thanks!
My pleasure! 🙂
I'm going to try that. Thanks a lot for such a detailed tutorial. Pinning it as well
So glad it helped! <3
Thanks!!!!
i love the whale! is this the real pattern for it? i would love to make one for my nephew!
Thank you so much for the tutorial! This is great!! 😀
No problem! Glad you like it! 🙂
What a great tutorial. I create a lot of patterns but have never considered selling any because I wasn't sure how to frugally create a professional looking pattern. Thank you so much for taking the time to share this tutorial (found this post through pinterest!)
So glad it helped! Now go get selling those patterns girl! 😉
Thank you Hannah, I got a lot out of your tut. Can I ask you if you know how to then create bold outlines on your pieces?
Thank you
Erica
If you double click on the layer in the "layers" section, it will bring you to "layer style" and click "drop shadow." It will outline the empty edges. If you wanted white pattern pieces and the edge, just change the pieces to white and do the outline with the drop shadow. Hope that helps! 🙂
Very Cool!
Thank you for sharing,i can't wait to give it a whirl!
Love your Blog too!
Congrats to You and your family!
Sonja
THANK YOU for this! The information in this will definitely help me streamline my digitizing process, so glad I found this post.
So glad it helped! 🙂
this is just what I looking for, thank you, thank you, thank you!
No problem! 🙂
Can this be done in Photoshop Elements or do you need to have the advanced version of Photoshop? Thank you so much! This tutorial is awesome! (I've just barely started using Photoshop Elements…)
I'm not sure, as I don't have Photoshop Elements. I would just click around and see if you have the same tools, and the capability to create layers. Sorry I couldn't help more! <3
Thanks! I'll see what I can do 🙂
nope…Photoshop Elements doesn't have all of the tools 🙁
Sorry to keep bugging you….do you have photo shop CC? I'm just trying to figure out what photo shop program I need. Thanks!
Oh no! So disappointing! 🙁
This is wonderful. I am not quite much with the internet, but I believe that what I just read is some good material. Thanks for writing such wonderful article. God bless.
Estimating Embroidery
What a great tutorial. I create a lot of patterns but have never considered selling any because I wasn't sure how to frugally create a professional looking pattern. Thank you so much for taking the time to share this tutorial.
Hello! I love your patterns, I did a test run of this Rarity (to put on a fleece hat) but I ran into some trouble. It seemed as if the pattern shifted (the body outline) and the mane/tail had issues. I think it was something that was wrong with my fabric/stabilizer. Do you have any tips for embroidering on fleece?
Hi, I love your tutorial. I was thinking if I digitalize the pattern, and I will need to change the measurements, how can I do that? Especially how I will count the inches?