


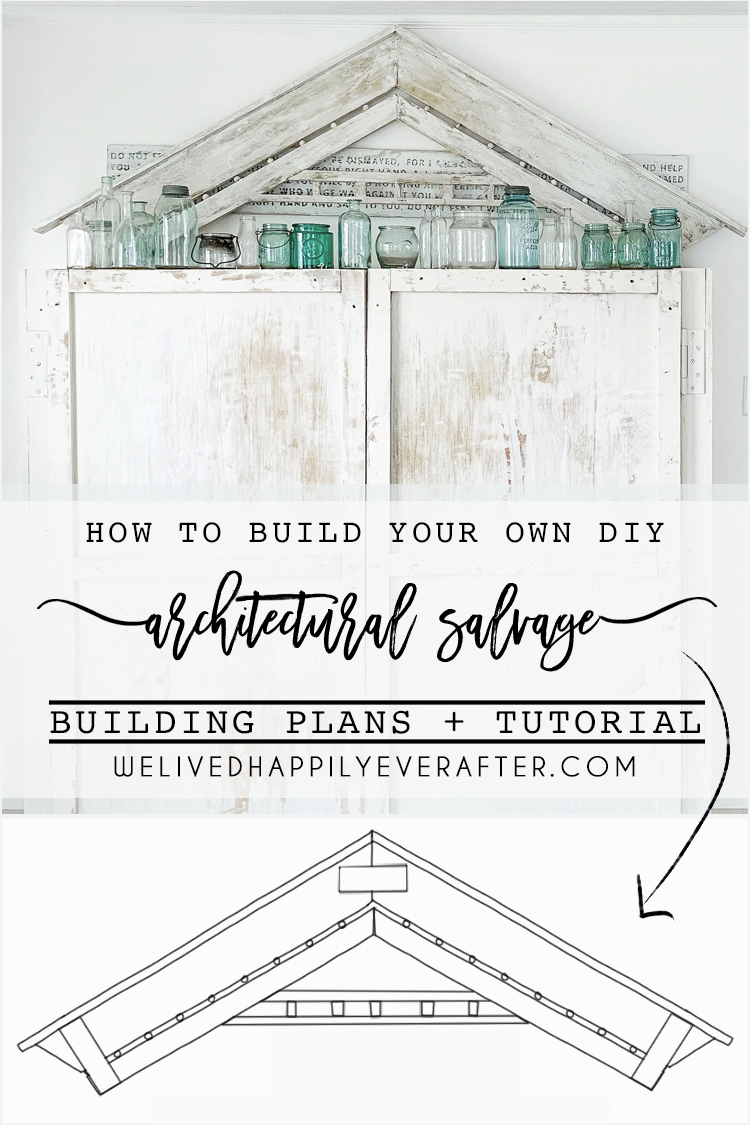
FRIENDS! My DIY Chippy Architectural Antique Salvage dreams have come true. Today’s post is going to show you how I make my own vintage looking antiques using new materials for an old world look & feel. Are you ready to see how to build your very own DIY Arch (with step by step building plans!?) Read on.
This post includes affiliate links. But I only recommend things that I love & think you will too.
Ever since I shared how to make something look old using Saltawash & paint, you all have been excitedly waiting for me to share the tutorial and building plans on how to make your own DIY Architectural Salvage Arch. Well, today is the day!
I’ve always loved those chippy old arches. But even putting aside the inevitable lead paint that comes with painted antiques, I knew I could make one for WAY less than the authentic stuff sells for. Comparatively, I’ve seen pieces like this go for $600. I made mine for maybe $30 in lumber, scrapwood from other projects, beads, and paint.
I seriously DO love antiques. Don’t get me wrong. But in the end, what I build brings me just as much joy as the real thing. And my mamma’s heart doesn’t have to worry about my baby and kids accidentally getting lead paint chips in their precious little bodies. So here’s the run down of how I built my own DIY Salvage Archway.
I tried to recreate measurement and angles as best as I could, but please always make sure to double check your own measurements & cuts. Here’s the step by step:
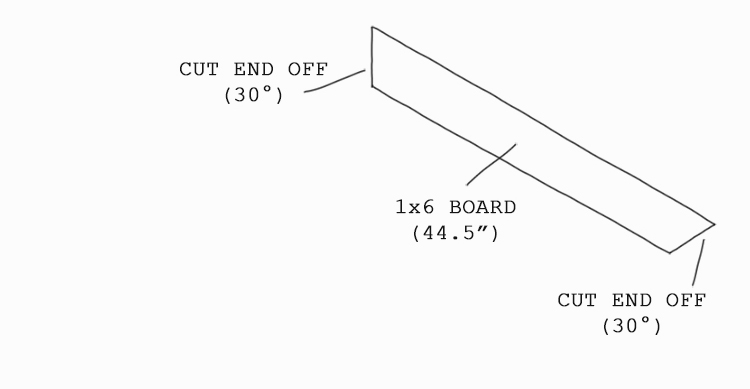
Step 1. Cut a 1×6 board down to 44.5″ Cut both ends off at a 30 degree angle. Repeat this cut on a second board and set aside for later.
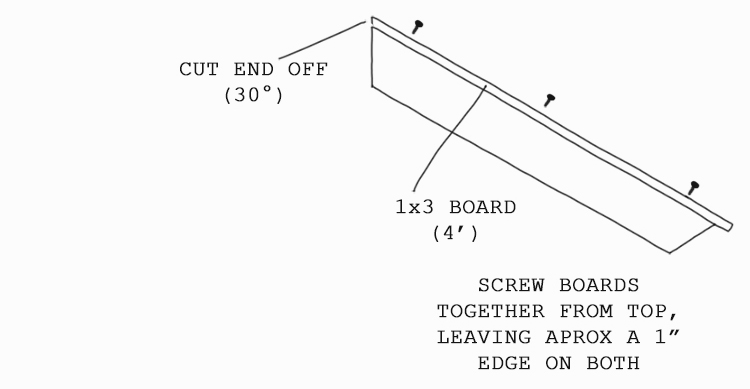
Step 2. Cut a 1×3 Board down to 4′. Then with your saw tilted sideways at 30 degrees, cut the end of your board downwards on one side. Repeat cuts with second board & set aside. Placing board on top of the 1×6, screw it down while leaving a 1″ ledge on both sides.
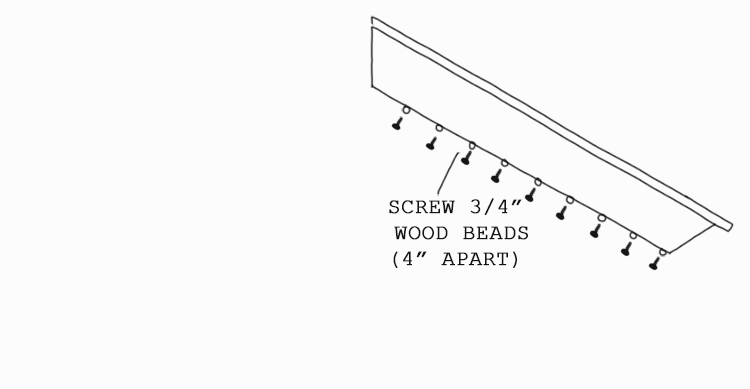
Step 3. Screw wooden beads (I got mine HERE) 4″ apart onto bottom of the 1×6 board.
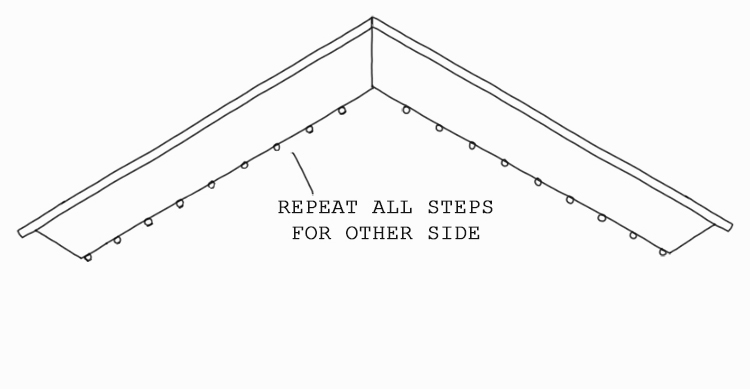
Step 4. Repeat above steps the with the duplicate boards we set aside for later.
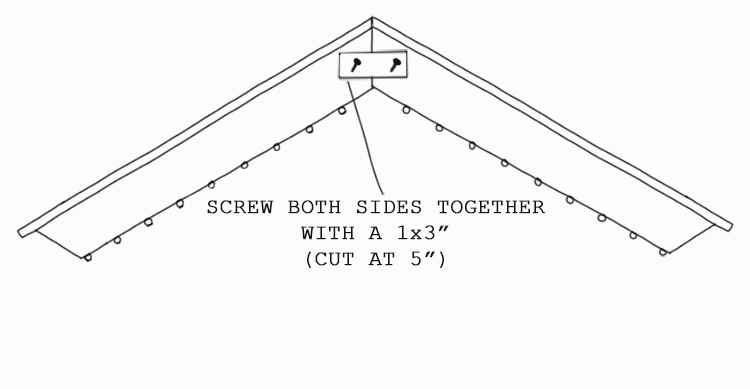
Step 5. Screw both sides together with a 1×3 cut at 5″- secure both 1×6 boards. You can also add a pocket hole or two if you like.
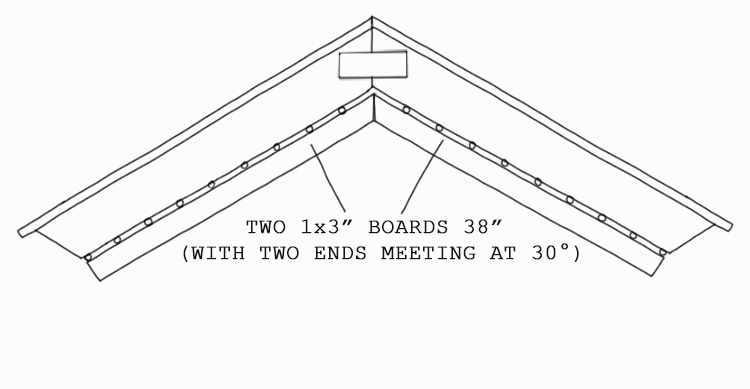
Step 6. Cut two 1×3″ boards at 38″, and cut the ends in the middle to meet at 3o degrees. Screw them together where they meet (I used a pocket hole)
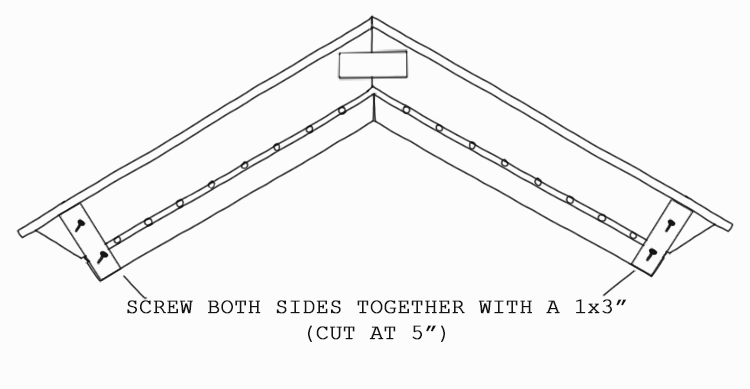
Cut two 1×3″ boards at 5″ and crew the ends onto the 1×6″.
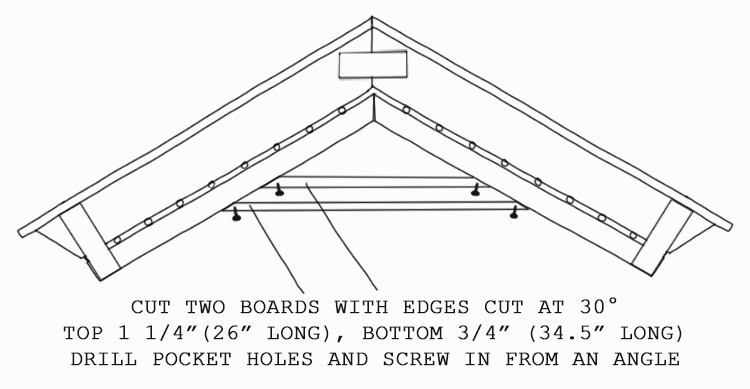
Cut two boards at 30 degrees on both sides (FYI- I’m pretty sure it was 30- I can’t quite remember- haha!). I’m pretty sure that I had to lay the uncut boards under the arch to mark where each one should be cut. I ended up with a slight gap on one of the sides, which I added wood putty to.

Cut little pieces of scrap wood in-between the two boards for extra interest.
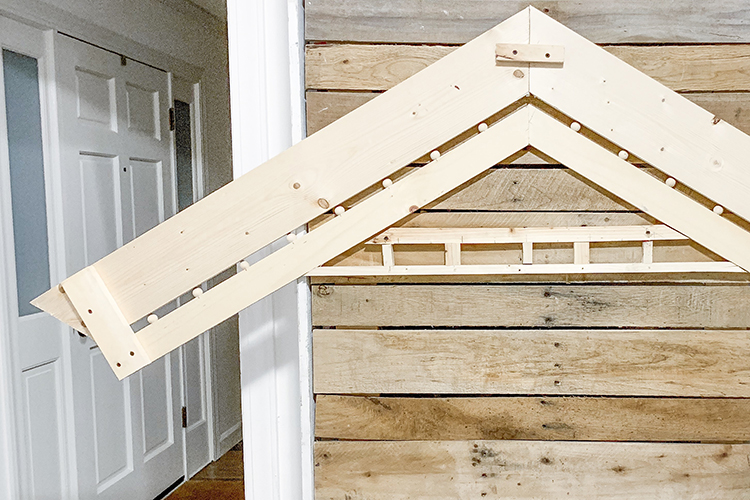
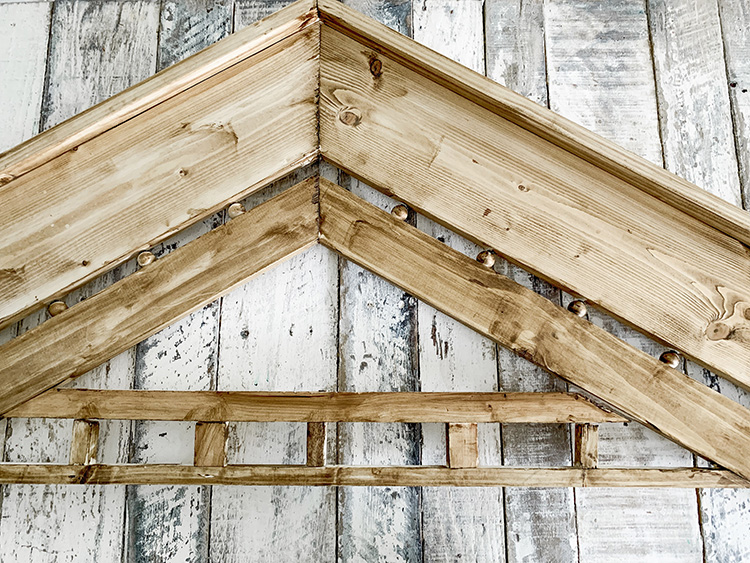
TA- Da! Here’s what it looks like from the back.
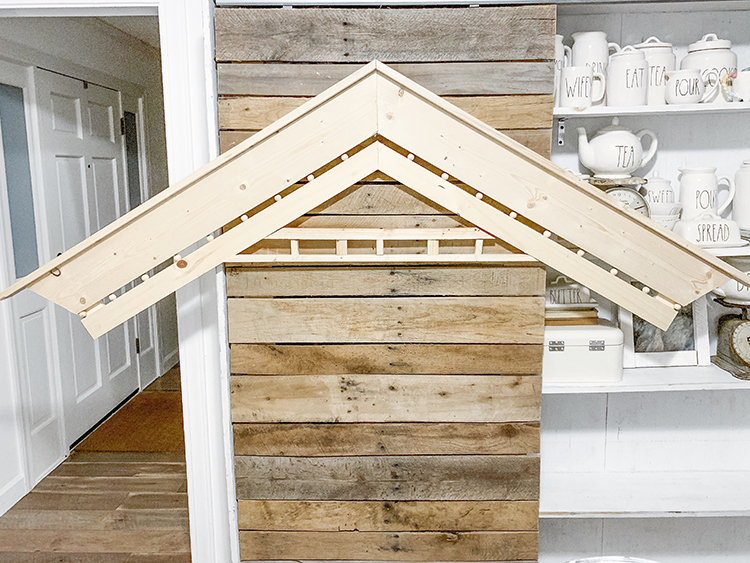
And here’s the front.
This ended up being the second largest architectural piece I’ve built to date. The only one that’s larger is the one above my TV in the living room.
The next step was to stain the wood.
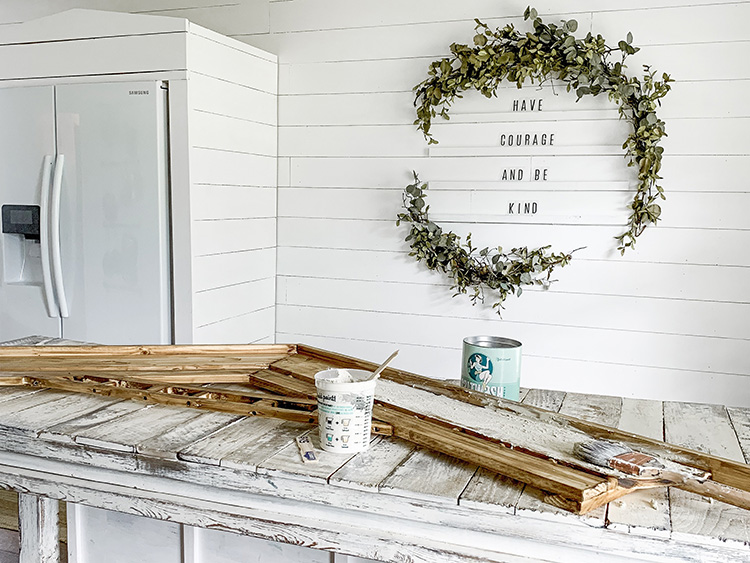
And then I painted it using latex & Saltwash. You can see my full tutorial for that process on THIS POST here.
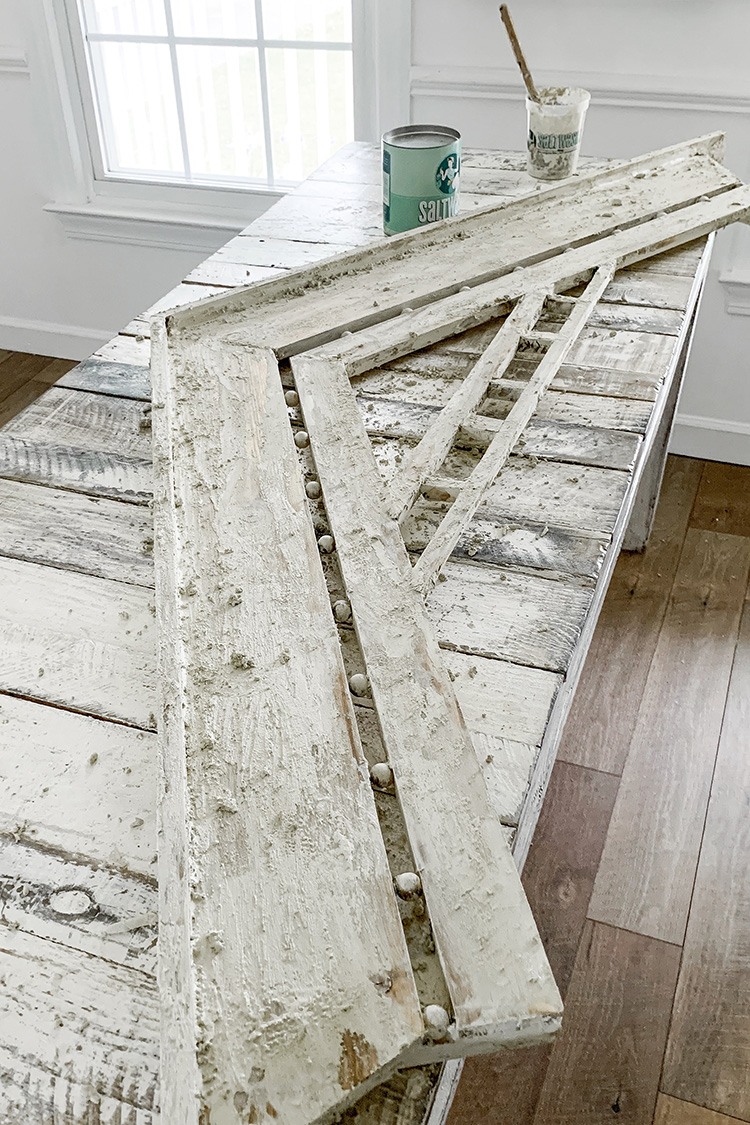
Not going to lie, this part was messy- but also one of the funnest things I’ve ever done!
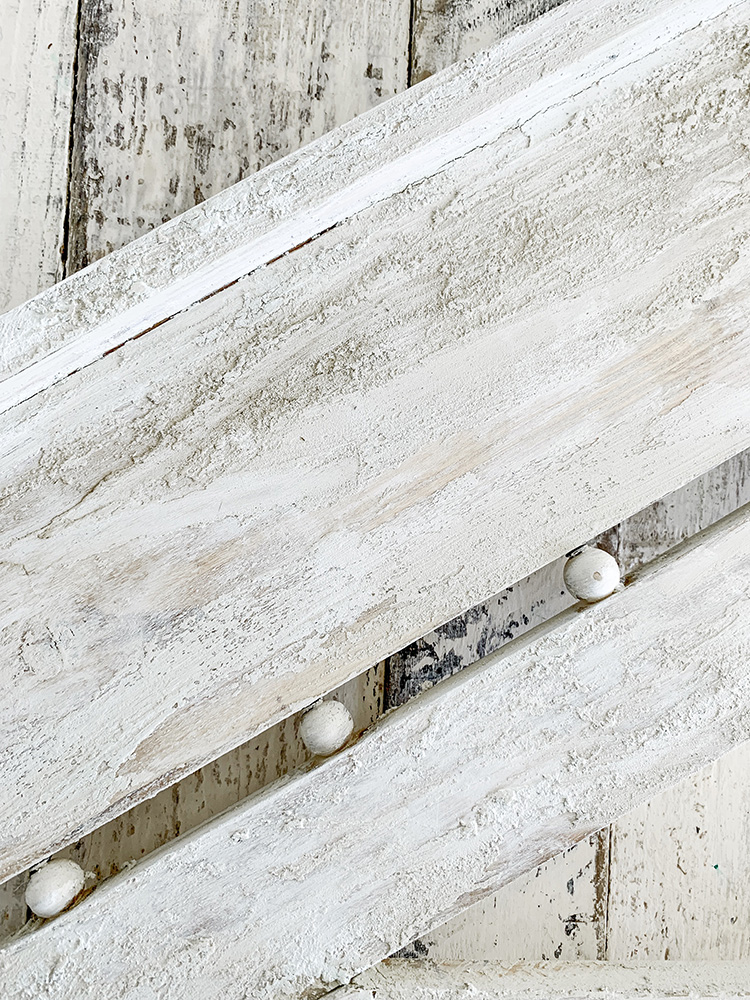
Here’s a close up of the awesome finish I was able to get on this baby.

I love how it turned out in the end. I really looks authentically old & crumbly, which is exactly what I wanted to do. I love making something NEW look old and chippy!
You can get the wood beads I used on this arch HERE. And if you want to get your hands on the Saltwash I used to paint this piece (step by step tutorial) you can buy it HERE, and use this code for 10% off: HannahHathaway
OTHER POSTS YOU MAY LIKE:
DIY Butcher Block Kitchen Island | Shiplap Fridge Enclosure Tutorial & Building Plans | How to Build A 7 Foot Long Farmhouse Table for $45


This is the coolest project! Gotta make it!! xo