


From the moment I saw the first play teepee in my pinterest feed I jut knew I had to make one for myself… but then I realized that might make me look a little weird… So I decided I would blame the need to make one on my daughter, June. That way I could tell everyone it was for her (Don’t tell anyone my secret!)
And now that I finally made my tepee, I am going to share with you how you can make one two… and for only $30! Call it a cheap DIY with a BIG impact! This project brought my whole design for June’s $55 Playroom together.
Want to make one yourself? Here’s the easy DIY Tutorial:


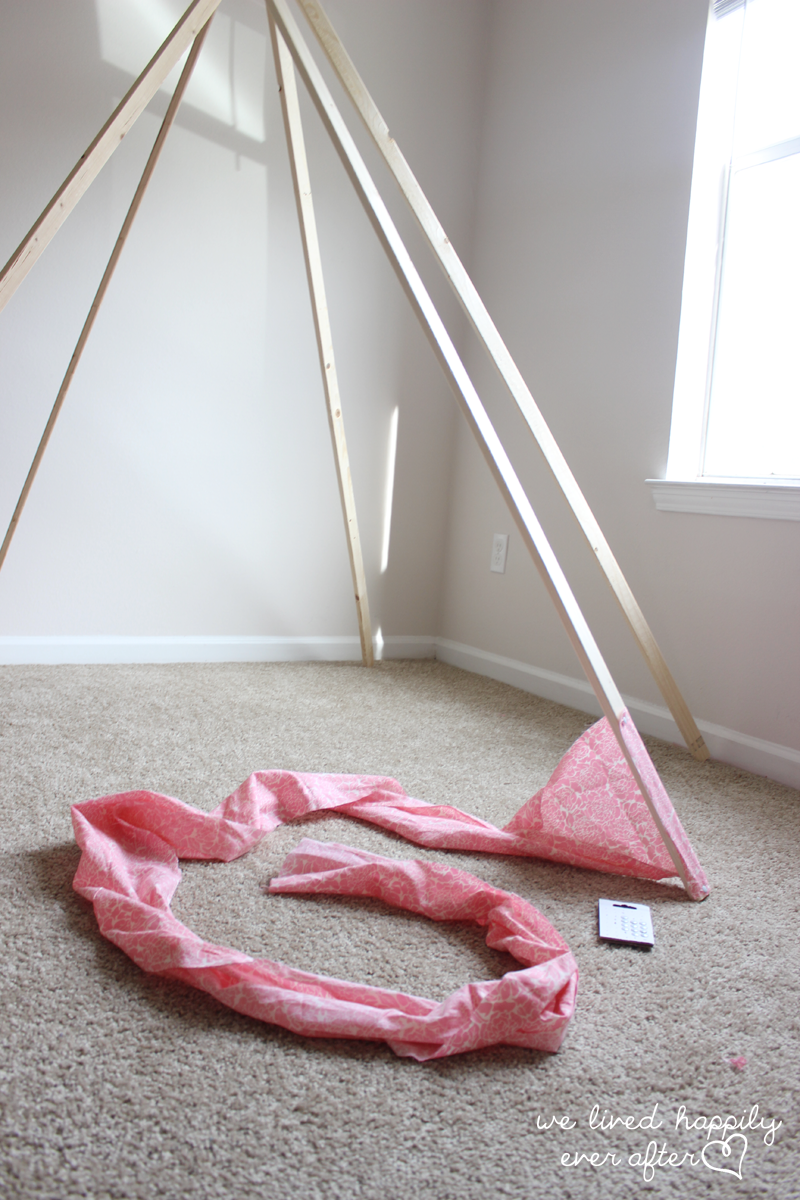
I bought 5 2″x1″x8′ boards. I cut them down about 12 inches. I just wanted to make sure that that they wouldn’t be too tall.
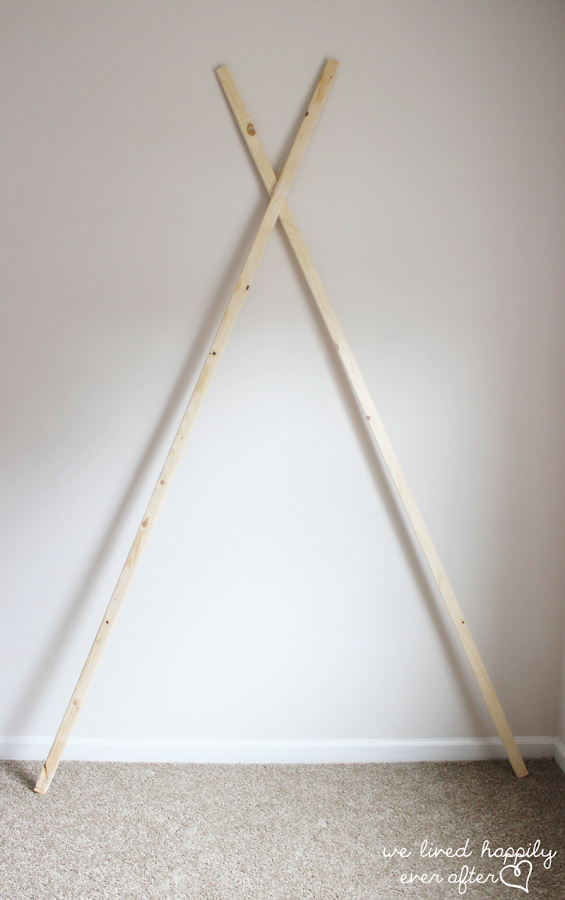
Next I decided how & where I wanted each frame to overlap.

I secured two boards at a time with some string to make them stay in place in an A Frame. Note: you will only have two “A Frame” sets of board, and one board will be left out. Once I was happy with the spacing for the first set, I replicated it by securing the other boards in the exact same place and in the exact same width. As far as how wide I placed them apart, I would say that the distance from one to the other on ground is about Two Feet.
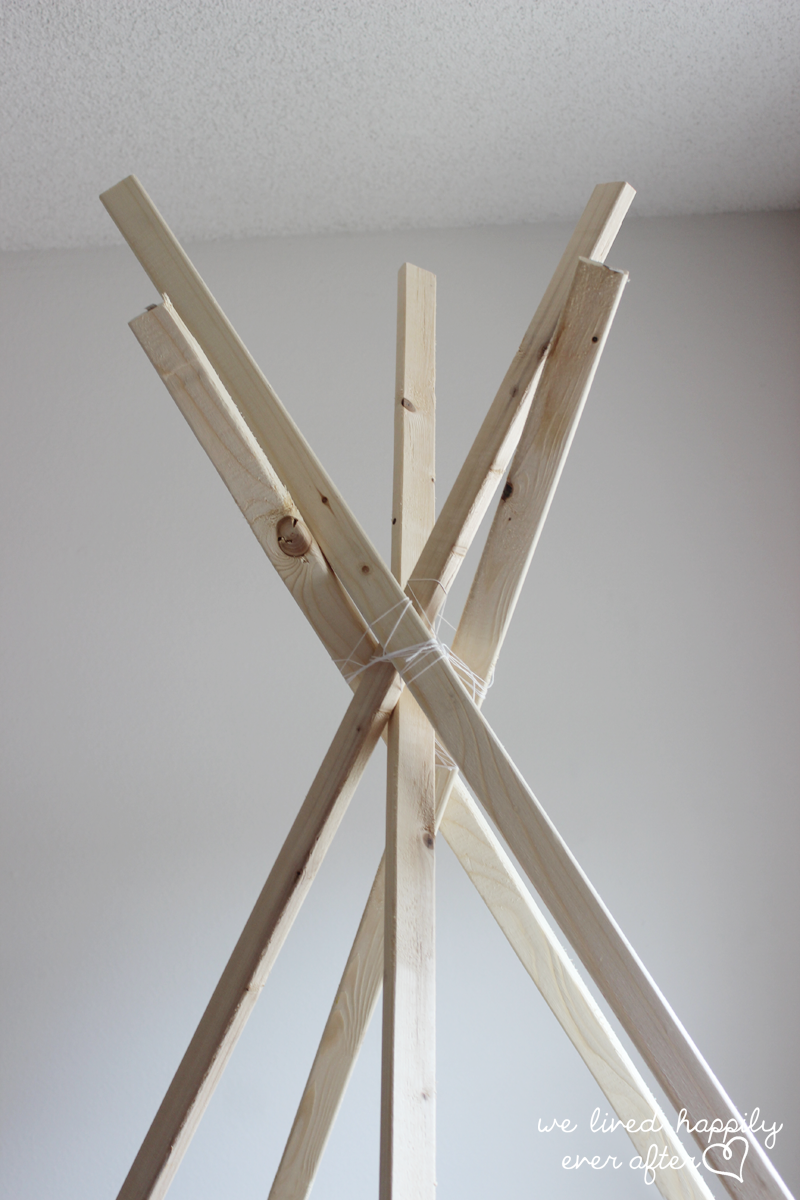
Then I put the two pairs of intersecting A Frame boards together, added the fifth board, and made sure they were all spaced correctly (Two Feet between each board) Then I tied it all together with string. Don’t worry if it’s not totally secure, just as long as it’s staying in place you will be fine. We will make it more secure in the next step.

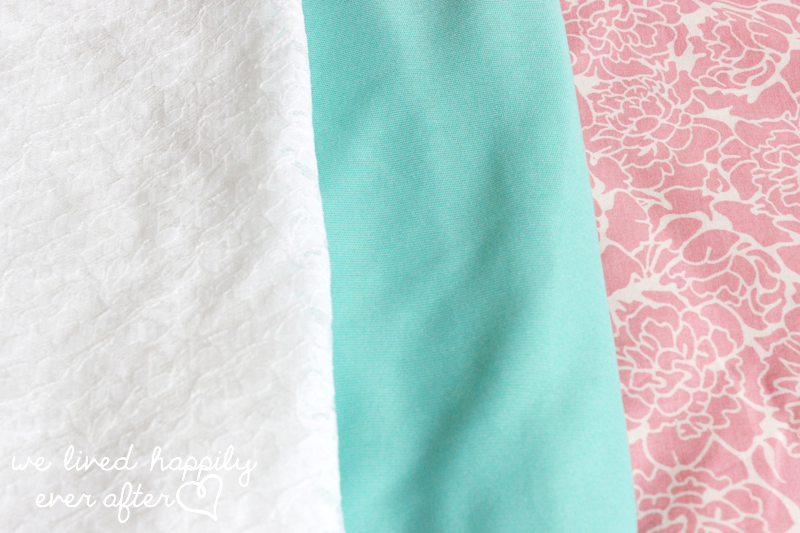
I picked out 3 yards of each of the above fabrics for the teepee. Like I said in the beginning of the post, I didn’t end up using the teal color, which meant that I really should have bought 4 yards each of the lace and the pink peony cotton. You want to make sure that all your fabric wraps around your teepee without having to sew strips together, so for the number of boards I used (5) you should probably get 4 or more yards of both (all in ONE cut, don’t get your cuts in individual yards)
If you want to ensure that you get the exact measurements for your teepee, make the frame first, measure out the circumference of the base, and then get that amount. I just kinda guessed out how much I would need… and it all worked out, but I had to be kinda creative to make it work with only 3 yards of each.
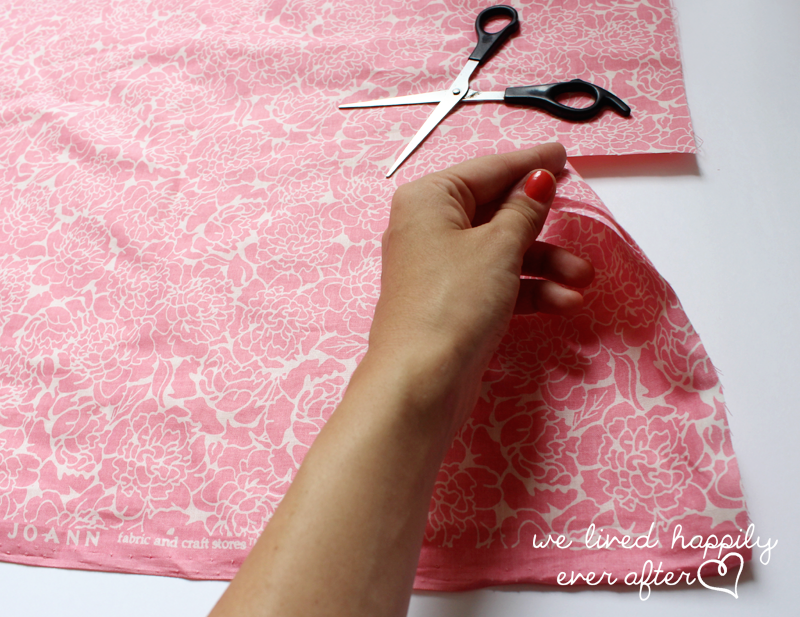
There isn’t any real rhyme or method to this part. I just cut out long and relatively wide strips of fabric (cut along the length of your fabric) They don’t all have to be the same width, but if you have a pattern in mind that’s totally fine too. The only pattern I had was to alternate from the lace to the pink cotton.
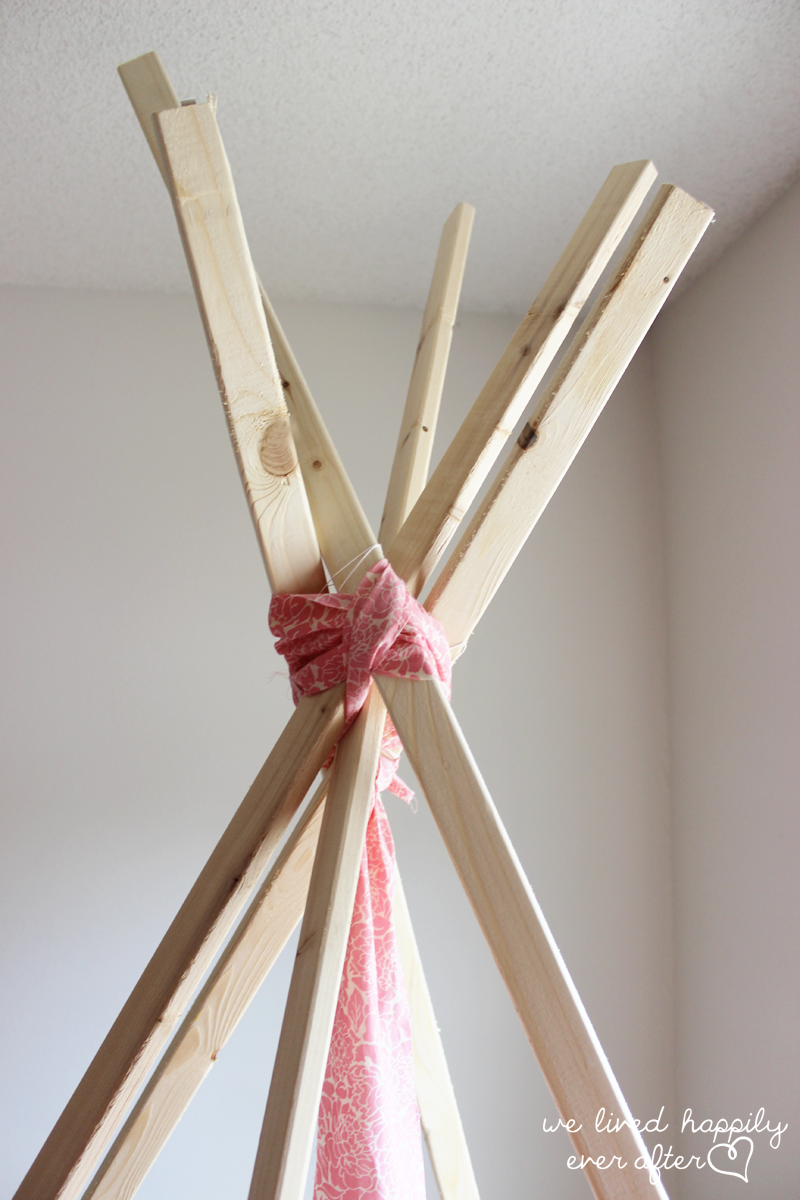
I took a strip of my fabric and secured the boards tightly. Make sure they aren’t going anywhere.
One tip I have for this part is to secure your wood board legs to the ground to make sure they aren’t moving around (or being bumped by your one year old…) and thus messing up the flow of your strips of fabric. Do this ahead of time, so you won’t have to re-do it in the future (no, that didn’t happen to me once… I think 3 times was the number!)

I used tacks to secure all my fabric.
My reason for choosing tacks over hot glue or sewing was that I need this teepee to be easy to take down when we have to move in a few months, and I didn’t want to damage the fabric so that I can make this teepee again in our new home.
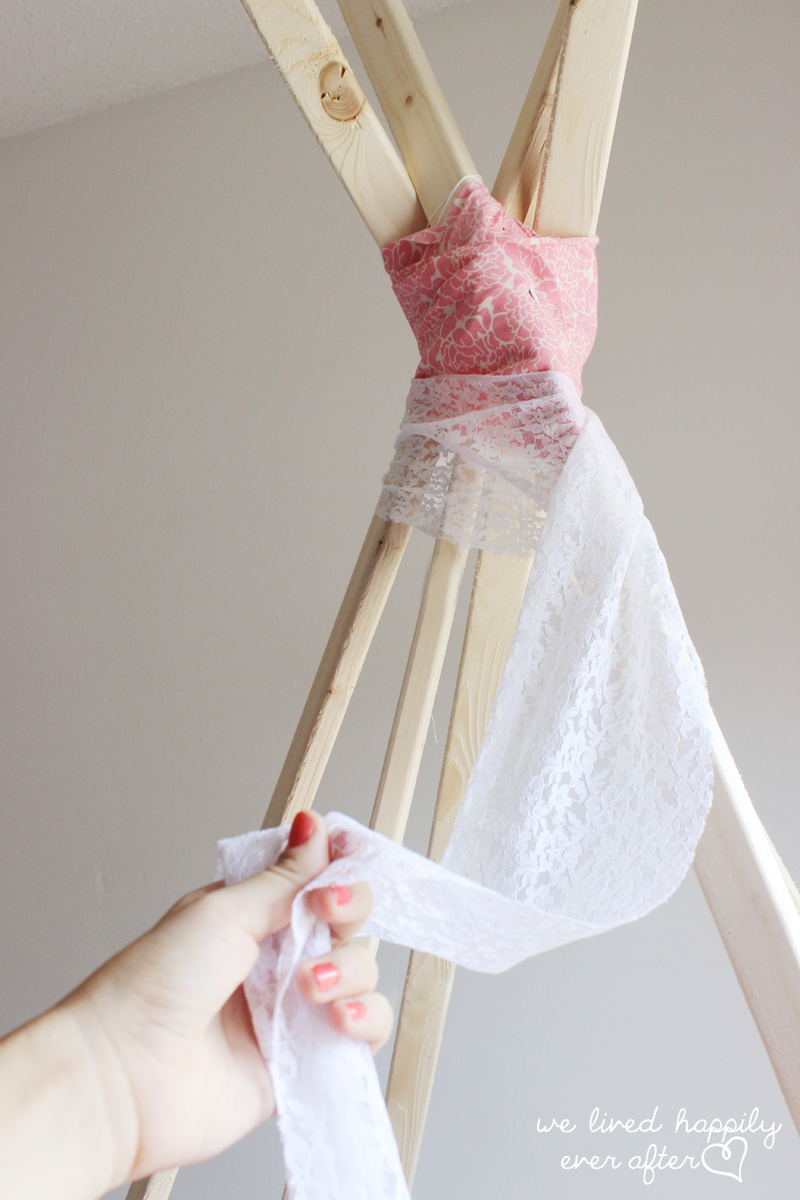
After securing the boards together at the top, I added my next layer. When going around the whole circumference of the teepee, I suggest starting in one of the back poles to minimize the seam of fabric strips meeting together. Just wrap it around until the ends meet.

Cut your fabric strip to the needed length.

And secure anywhere needed with your tacks. Make sure to push them in really well.
Now I suggest doing the rest from the bottom up. That way your original circumference doesn’t get messed up from you accidentally bumping the top poles a tiny bit, thus really bumping them on the bottom. It only took me the third time around to realize this… learn from my mistakes people. That’s why I’m writing this tutorial right? So you can get it done right the FIRST time! 😉

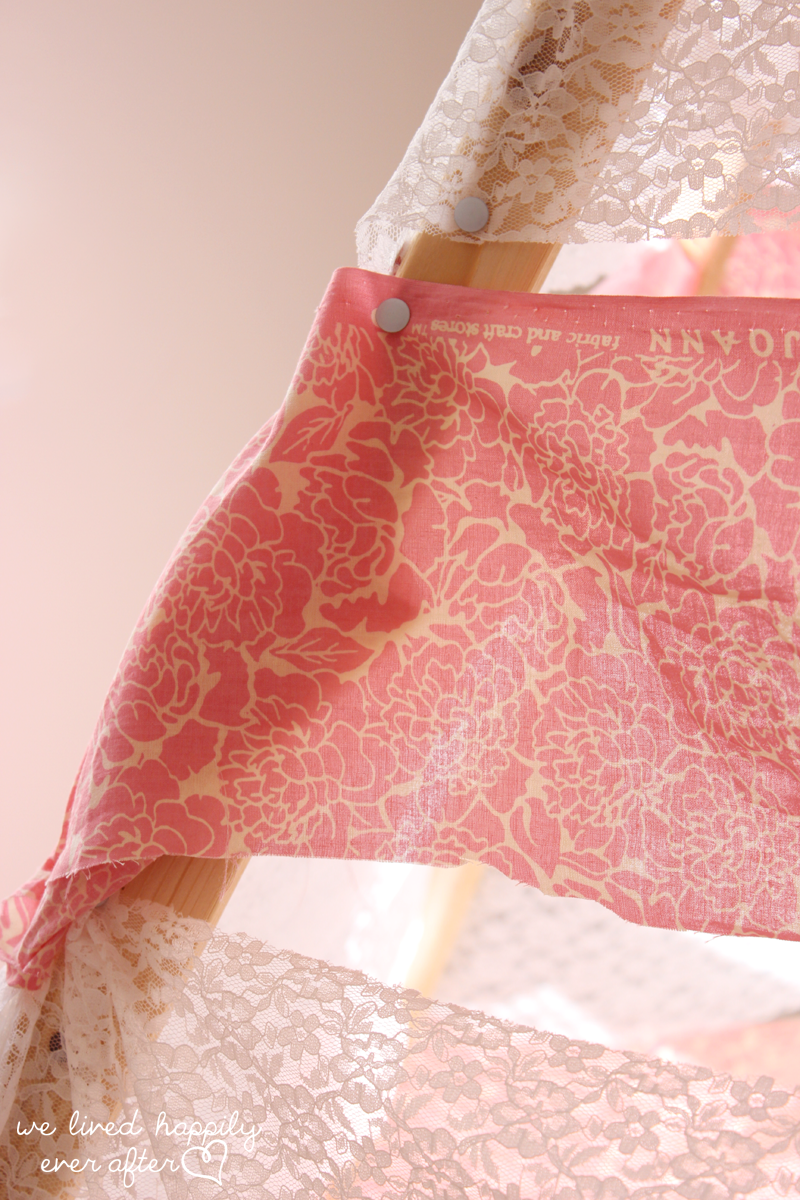
When adding each strip of fabric that will start at the opening of the teepee, you should tack it on the back edge of the board…

And then wrap your fabric around it so that it is totally covered. Those tacks are covered and not going anywhere.

This is a close up of what I’m talking about.
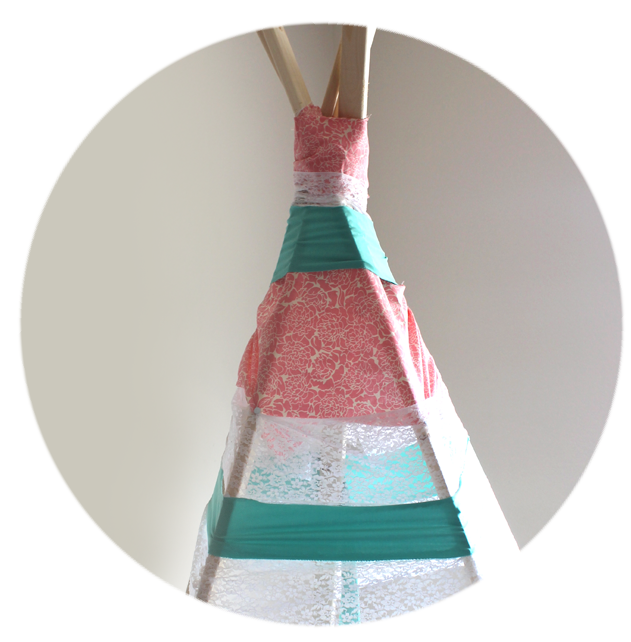
As you are working with a cone shape, your fabric will not lay perfectly (notice the above picture) So you may need to make a few adjustments on each corner of the teepee and tuck the fabric closer to the top into a fold to minimize floppy gaps in your fabric. One trick I used was to twist it on the loose area and then tack it in place.


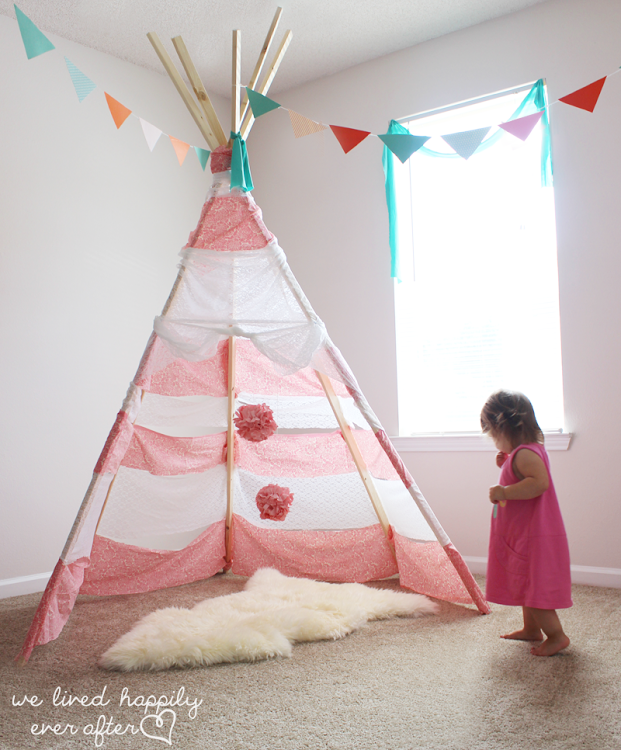
Don’t get so wrapped up in your project that your forget who you are making it for! I mean, I was really making this for myself, but hiding that fact under the pretense of “June needs a teepee in her room!” Haha!

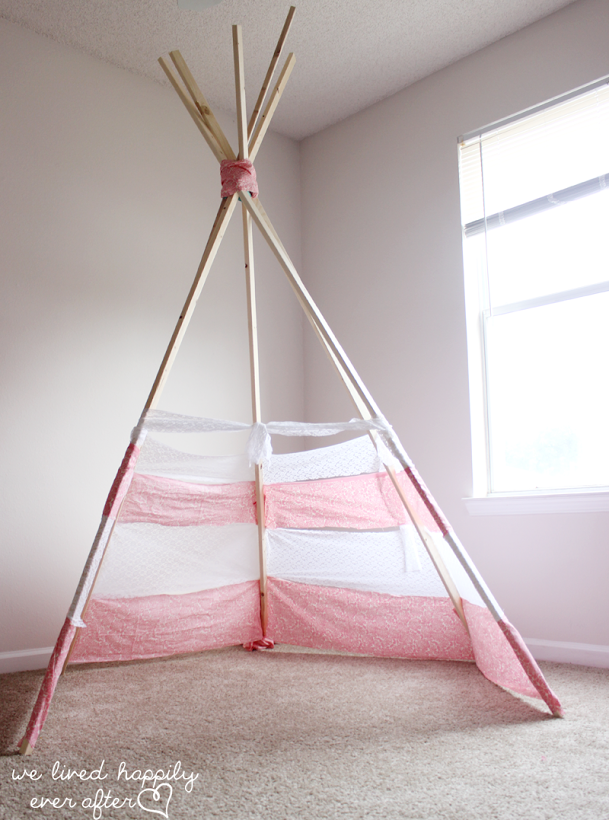
It may be slightly hard to tell from the frontal view of this picture, but once I got about half way up, I added a strip of fabric across my opening to act as the start of the top of my teepee.

I added some poofy sides to make it a little bit more visually appealing than a straight line of fabric. And then I added a super wide strip of lace on the top of my teepee. I think it gives it a nice visual flow.

Once you have finished all the layering of your teepee you only have the super fun stuff left (what a sacrifice of love and time that thing was to make for yourself… opps! I mean your child!)

Add the finishing touches to my adorable teepee was my favorite part- I think adding these printing paper party poms I made tied the whole space together.

I did manage to sneak a little bit of the teal fabric in at the top.
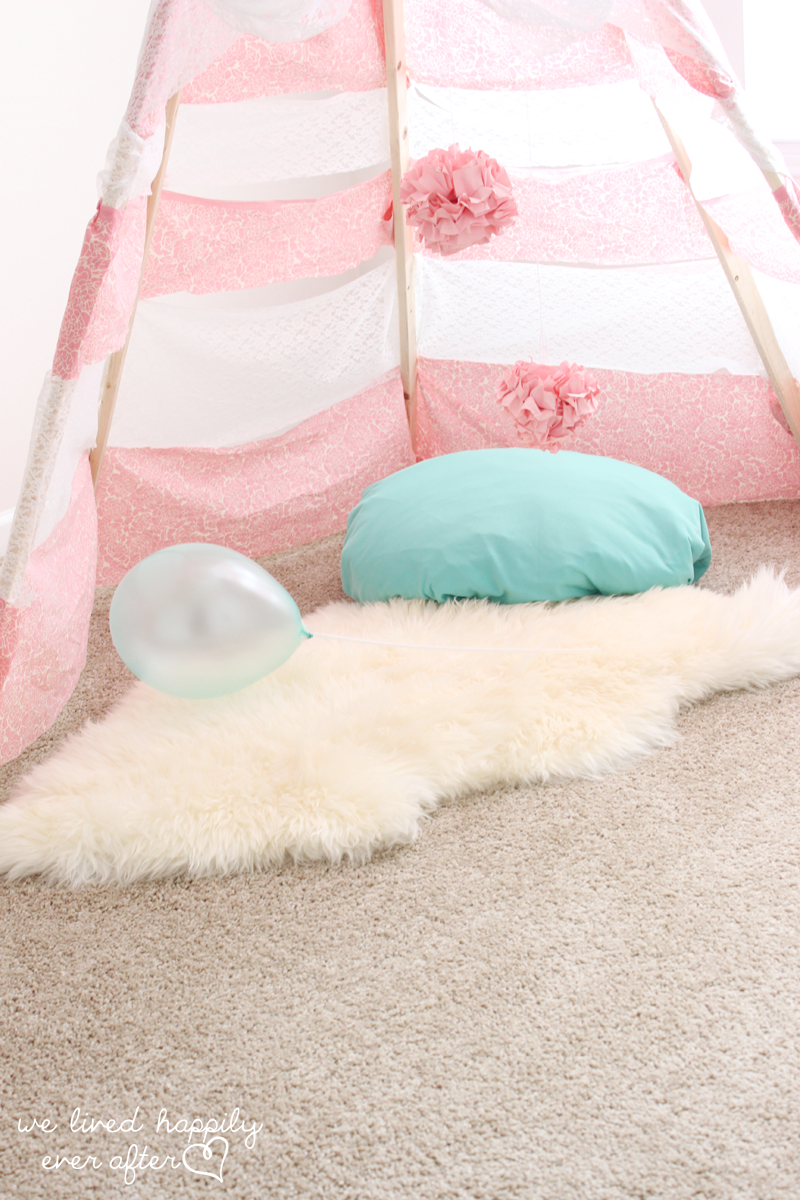
I am so in love with this sheepskin rug my mother in law gave us when June was born. I makes the whole nook so comfy and complete!

Finally! The only thing left for you (I mean for your child) to do is to play in it!
This wasn’t a super easy project to do, but that doesn’t mean that anyone can’t do it! The main thing was that it was time consuming because I re-did it a few times (like when I wasn’t happy with the color combo)
Overall, any of the hardships that may occur in making a teepee are almost instantly forgotten when you can stand back and enjoy it, fully finished. Total Cost 28.09
$18.24 total for the Fabric (The Lace was $10.77 for 3 yards @ $3.59/yrd. And the Pink Peony Cotton fabric was $7.47 for pink peony 3yd @ $2.49/yrd
$4.85 for all Five Boards (they were 2″x1″x8′)
$5.00-Tacks
Do you love it? Want to come over and play in it? Let me know by leaving a comment below!


Oh my gosh, this is awesome. I want to make my little a teepee now!!!
You should! It's so much fun! 🙂
super cute and a great tutorial! I love the versatility to change this around.
Thanks Leila! Xoxo
I just found this and I can't wait to make one 🙂 my niece will be 3 this summer and I think it will be a perfect present that she can grow into. Thanks for the great idea!!!
hi just wondering how the tacks have held? you havnt had any problems with them popping out?
I had to take it down after a few months because we moved- but I'm going to put it back up once we unpack- but the tacs worked pretty well- every now and then one would pop out, but was just constantly on the lookout just incase. You can always use a hot glue gun if it's going to be permanent. Hope that helps! 🙂
This is absolutely adorable (the teepee AND how much you enjoyed this project and interjected how it was pretty much YOUR project). Thanks for sharing! I kind of want to make one for my 25-year-old self.
Thank you Lindsay! And you totally should! 🙂
This is just too cute!
Aww! Thanks! XO
I was just wondering how you secured the boards of wood to the floor?? This is SOOO cute!
Hi Rach, The boards aren't secured to the floor, just tied together up top! Hope that helps! XO
What a great idea! I'll be making one soon for my 3 little ones 🙂
I want to make one for my self, then I can invite my husband and puppies over to "my teepee"
Thank you for the post! 🙂 ♥
Haha! I totally relate! 🙂
Such a great idea for your kids. I would need to figure out a way to fold it up because we don't have the space for this up all the time. If I can figure that out I will be making one. Thanks.
You could always make it smaller, and maybe use solid panels for the sides to make it more "fold-able"
Have fun! 🙂
Would this be able to be transported without having to take it apart?
Yes, except not in my case where I didn't have a long enough car for the boards. Moving trucks would be fine though. XO
Where did you find fabric and boards that cheap?! Please share! I can't wait to make this for my daughter's nursery!
Hi! Sorry for the late response. The boards are form Lowes (from the cheap section) and the fabric was Joanns. Use coupons! XO