


How To Grow Heirloom Fairytale Pumpkins From Seed (DIY Pumpkin Patch!) I’ve received SO many questions from you all about how we grew our own fairytale heirloom pumpkin patch this year. For years it’s been a dream of mine to have a home grown garden full of heirloom pumpkins. So it doesn’t surprise me that so many of you are interested in this process as well. I hope my experience inspires you to grow your own little “Pinterest worthy” DIY pumpkin patch next year!
Here is the run down of everything I learned: The types of pumpkins we grew; where I purchased my seeds; how to plant and care for the pumpkin plants; what fertilizers & pest control to use to keep them healthy; how to hand pollinate pumpkin plants (and tell a female and male pumpkin flower apart); and finally how to harvest, clean & make them last all fall long.
I did a quick FAQ video of some of the basics if you want to see visuals. Just press play!
Disclaimer: There are affiliate links in this post. But I only recommend products I love & think you will too.
So first off, a DIY pumpkin patch requires land. We have a pretty large lot, and I did three rows of plants, with a total of 18 mounds. I had three pumpkin plants per mound. All in all, while the vines branch & spread out a lot, it probably took up 1/6th of an acre.
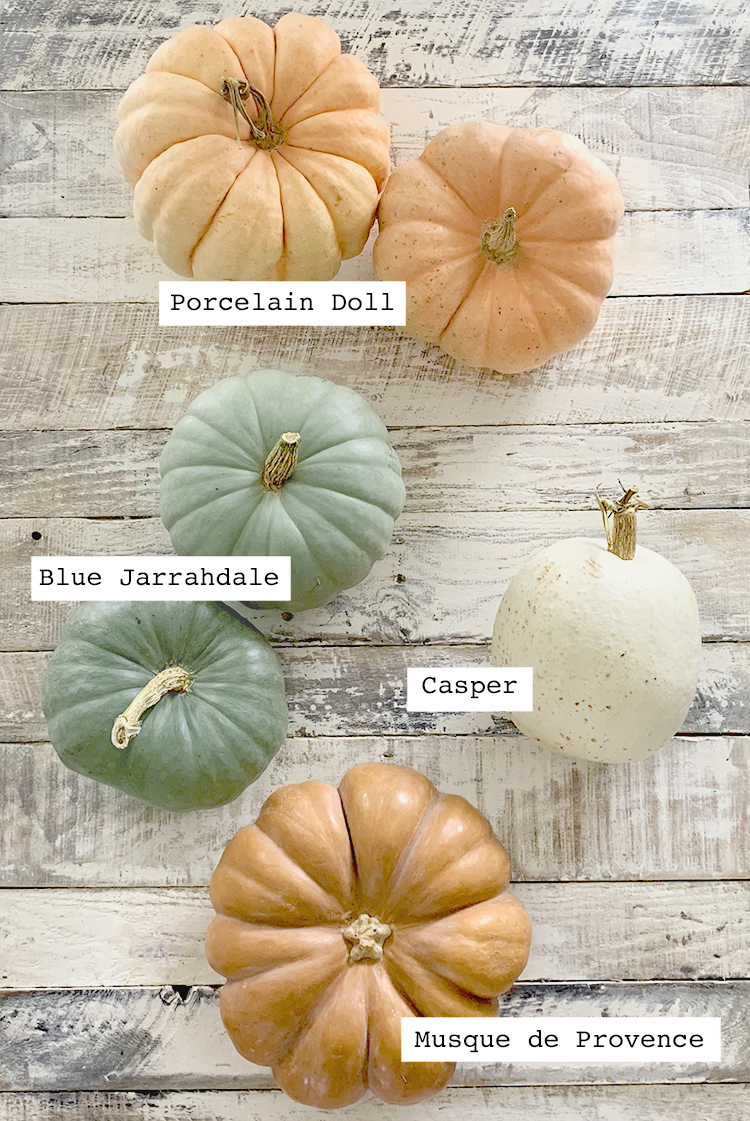
I wanted lots of color for my fall decor this year. Here are my favorite types of pumpkins I grew this time around:
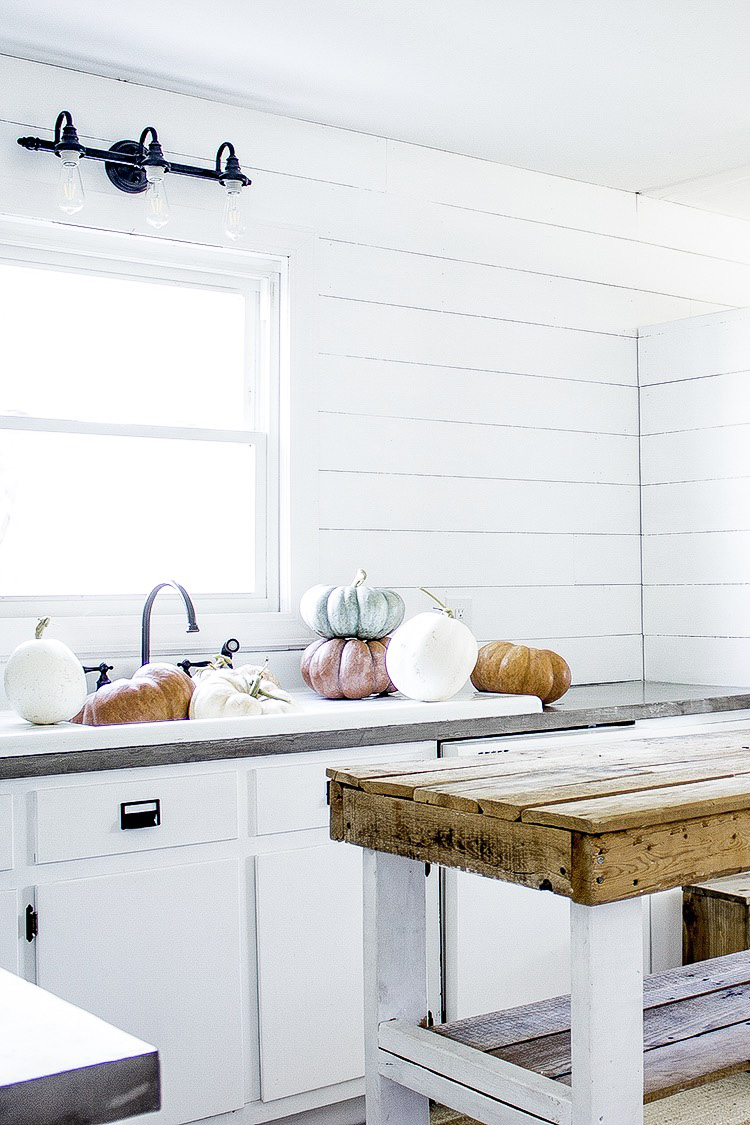
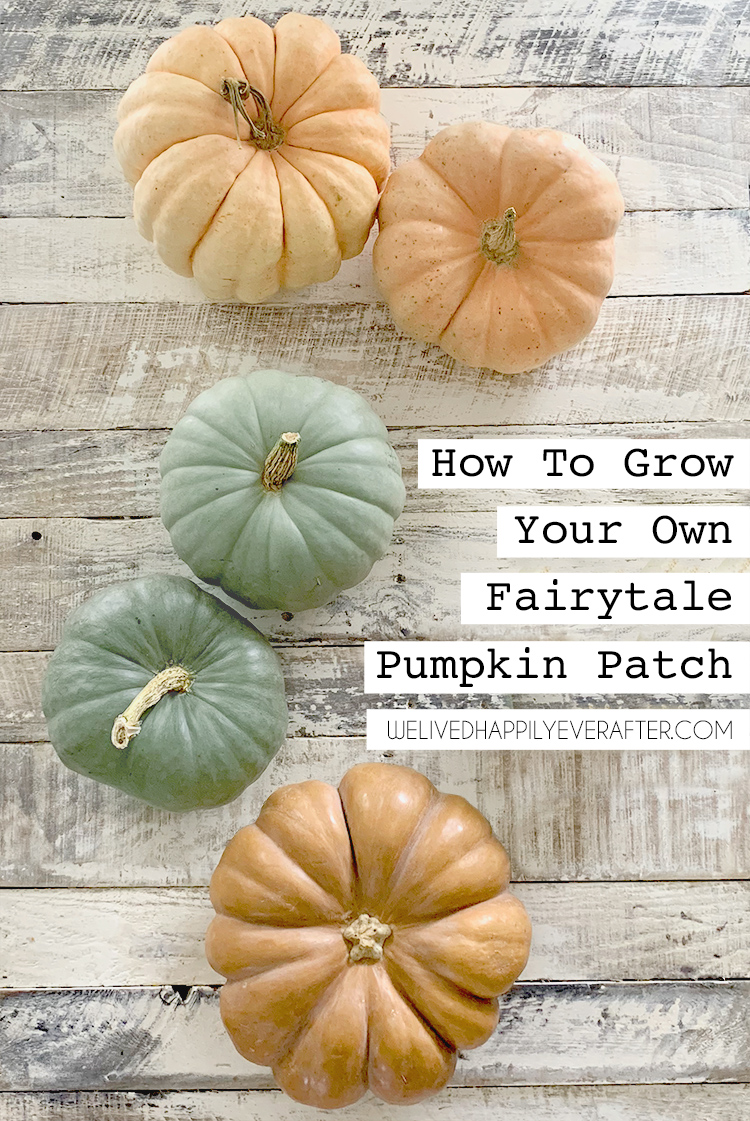
Porcelain Dolls– These pumpkins mature to an adorable baby doll pink. They are my hands down favorite.
Blue Jarrahdale– These cuties have a thick stem and mature from a deep green to a greenish blue. Mine didn’t start producing until later in the year, so I really didn’t get to let them ripen as long as I wish I could for that vibrant color and size.
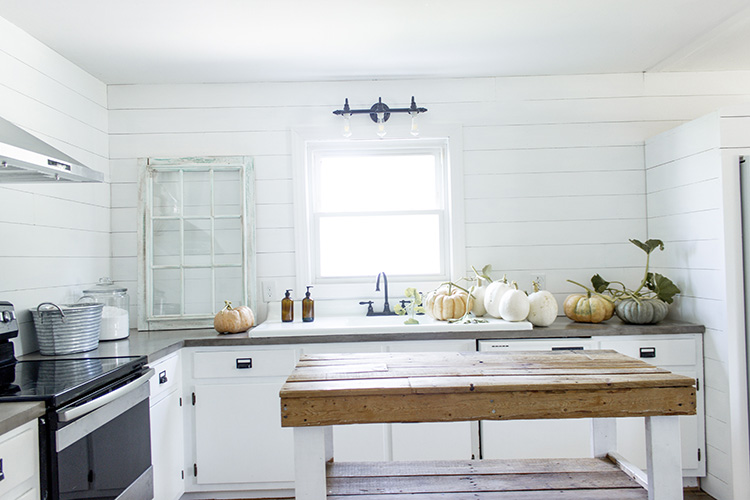
Casper- These babies are round and oh so creamy white. I loved using these heirlooms in my kitchen to dress up my island.
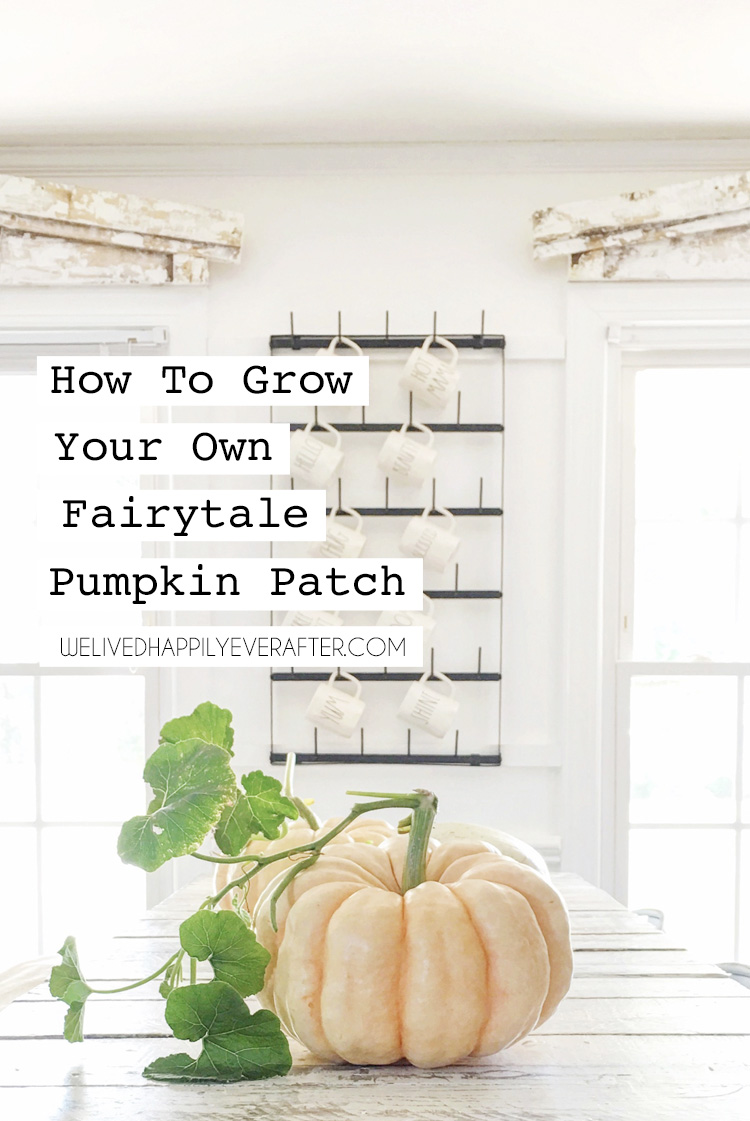
Musque de Provence- Otherwise know as “Fairytale Pumpkins.” I love the traditional orange color of pumpkins in this unique shape. I want a million of these babies next year.
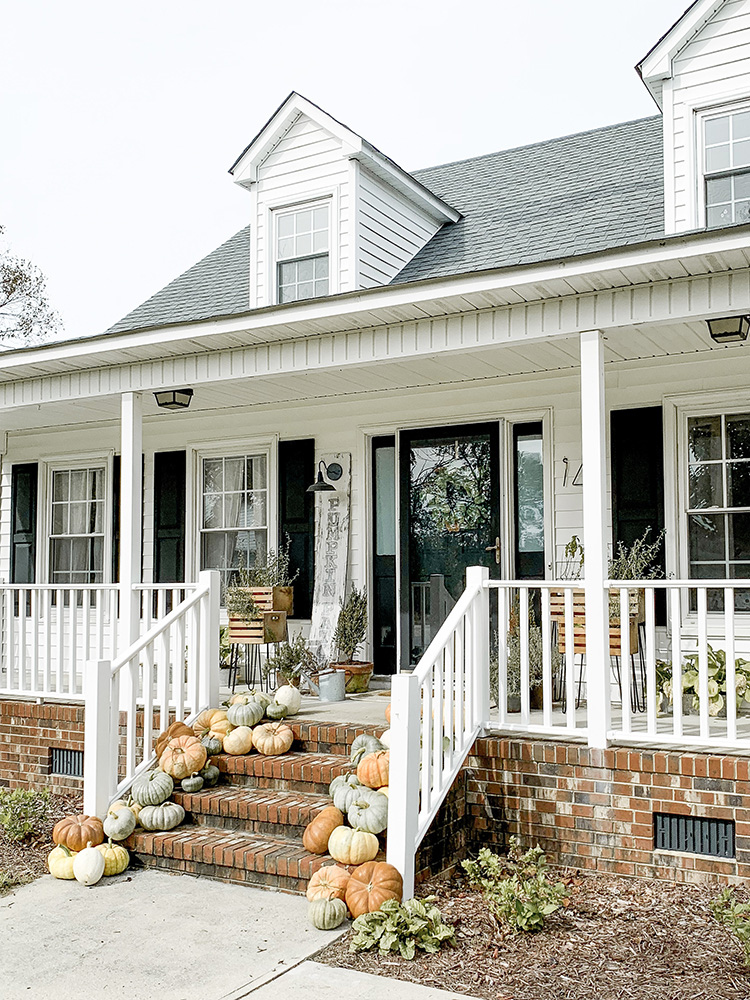
I had a couple other variations grow in my garden, but to be honest, I think some of the seeds I got must have either gotten mixed up, or were accidentally cross pollinated, as they were shapes and colors that I didn’t recognize from the ones I purchased. But no hard feelings, they all were adorable & made our home and front porch so welcoming this fall!
Growing my own pumpkin patch has been the best hobby! They truly are the jewels of the fall.
For plant supplements & supplies for my DIY pumpkin patch, I used the following:


Step 1: Miracle Grow Soil– We used bags of THIS SOIL to create the pumpkin mounds. I wanted really healthy soil since were were planting directly in our lawn. So we dug the large mounds (about 2-3 feet in circumference per mound), filled the holes with Miracle Grow Soil, and then I staked landscapers fabric over the grass between the rows of mounds to keep the grass down so it wouldn’t get overgrown. This allowed my pumpkin plants to get big and strong without competition. While I tried to direct the vines onto the tarp while they were small, the larger vines did need to be able to root eventually, so I let them grow out towards the grass at the end of the season.

Step 2: Nitrogen– You can add Nitrogen to the soil during early growth. It allows the plant to really explode from seed to healthy green vine. Be careful to never get it on the leaves though, as it will burn your plant. I’m no scientist, but I added a tablespoon to my watering can, filled it up with water & watered the mounds manually (making sure to to touch the plant) I did this once a week the first several weeks. It probably took 2 watering cans to apply this to all 18 of my mounds each time. Also, too much Nitrogen can make your plant focus too much on it’s “green growth” instead of it’s flowers. So you really want to just use this stuff in the beginning to jumpstart your plants for healthy roots, leaves and vines.

Step 3: Phosphorous– This is what I credit all the healthy flowers my pumpkin patch produced up to the very end. I’m talking hundreds of flower per plant. Phosphorous is magic. Again, not a scientist here (I had the hardest time finding instructions on how much stuff to add, so I just guessed) I added about a cup of this stuff at the base of my plants on each mound. I kinda mixed it in with the soil a bit. I added Phosphorous once my plants were ready to start flowering. This stuff won’t burn your plants, and over application won’t harm it as it comes in granular form. It promotes root growth & lots of healthy flowers and fruit.

Step 4: Potassium- you want to use Potassium once your pumpkins start growing on the vine. This stuff helps the fruit grow big and strong. Don’t use too much, as it can make the pumpkin outgrow it’s skin. I was more conservative with this stuff, using a couple tablespoons of it per watering can. Pretty much the same proportions as the nitrogen.

Use Throughout Season: Miracle Grow- Lastly, throughout the whole season I used Miracle Grow. It definitely has some of the same ingredients, but I added this (as directed) to my watering can when I wan’t adding other supplements.
The combination of all these fertilization products gave me a super healthy harvest of pumpkins that withstood even hurricane flooding (read this post HERE for more on that!)
Pest Control & Disease:


For pest control, we had to worry about bunnies and bugs. For the rabbits, I didn’t want to hurt them, but they were nibbling on my baby pumpkin fruit. So I found a scented repellent (don’t be grossed out, but it was wolf urine) and I also used liquid fence. Both products STINK, but they did their job. I just applied 1-2 times a week.
For bugs I went as natural as you can get. I used Pure Castille Soap mixed with water in a spray bottle. Then I sprayed the pumpkins, the vines, and the mounds. I put this mixture on them maybe once a week in the beginning. You want to try to do it early in the morning before the sun it out so the water on the plants doesn’t burn the leaves.
I had a little bit of powdery mildew on one plant, but I sprayed milk (just watered down milk in a spray bottle) directly on it. This knocked that disease out right away & I didn’t have any additional problems the rest of the year.
How To Tell A Female Pumpkin Flower From A Male Pumpkin Flower:
Watch the video at the top of this post to see the difference in person. But the male flowers usually bloom first. they tend to be all over the vine. A female has a tiny round baby pumpkin that looks like a ball on the bottom. They tend to grow along the end of a vine, low to the ground. Also, females have a stigma (multiple little portions in the middle of the flower that hold pollen) compared to male flowers which just have a single staman with pollen in the middle of the flower. Pumpkin plants have to have pollen from both the male and the female plant to grow a successful pumpkin. But the female flower is only open for a few hours on ONE day. So you really only have a short amount of time to make sure your pumpkin gets pollinated.
How To Hand Pollinate Heirloom Pumpkins (And how to avoid cross pollination and hybrid pumpkins):
If you have lots of bees you are in luck! They should get the job done for you. But if you are like me and are growing lots of different types of pumpkins in one small garden, you may want to do it yourself. The main reason I chose to hand pollinate was becuase I wanted to harvest seeds to plant for next year. So I did my best to avoid cross pollination so I wouldn’t end up with hybrid pumpkins. Hand pollinating is actually super easy. Once you get the hang of things you can tell the day before your female flower is about to bloom. I usually walk my garden every morning, and if one was open (they are only fertile for a couple hours after they open!), I would located a male flower from the same plant, pick & strip the petals off the male, and rub the centers of both flowers together to transfer the pollen. Some people suggest tapping the female flower shut after this to close it off from bees (who might transfer pollen from other kinds of squash plants on them) I didn’t go that far this year, but we will see about next fall.
A note about cross pollination: If your flowers got cross pollinated, you wouldn’t see the effect on that year’s crop. But if your heirloom got cross pollinated with a different pumpkin plant’s pollen, and you harvested seeds from that transaction, the NEXT year’s crop would look different. Nothing wrong with growing hybrids, but I kind of like to know what the pumpkins I’m planting are going to look like. Haha!
How To Keep Your Pumpkins From Rotting On The Vine (And Avoid Baby Pumpkins Falling Off):
The year started off with not much rain, and then our yard got flooded during Hurricane Florence. I had put some large laminate tiles under the pumpkins that were sitting on grass. It ended up being the best decision I made. That one simple thing saved all the pumpkins that were on the vine during the hurricane. It kept all the water & mud from getting under the pumpkins and making them rot. All the other pumpkins that I didn’t put any sort of plant/ground barrier died during that week. I also found that baby pumpkins in general did much better when propped up on a solid surface as they didn’t have to compete with the humid moisture on the wet ground.
How To Harvest your Pumpkins:
I actually did a whole post on this topic, so rather than repeat it on this post, just go HERE to see my tips on how to tell if your heirloom pumpkins are ripe; how & when to harvest them; and how to clean them so they stay fresh all fall!
So those are my tips. I know it was a little packed with info. But honestly I couldn’t find answers to all my questions when I was trying to learn the ins and outs of pumpkin farming. So I had to research multiple different places. And I wanted to help others in the same boat by compiling everything I learned this year. If you have any DIY pumpkin growing questions, feel free to drop them in a comment and I will do my best to respond!
SHOP THE PRODUCTS I USED:
THE TYPES OF HEIRLOOM PUMPKINS I GREW:


GARDEN PREP:
FERTILIZATION:
PEST CONTROL:

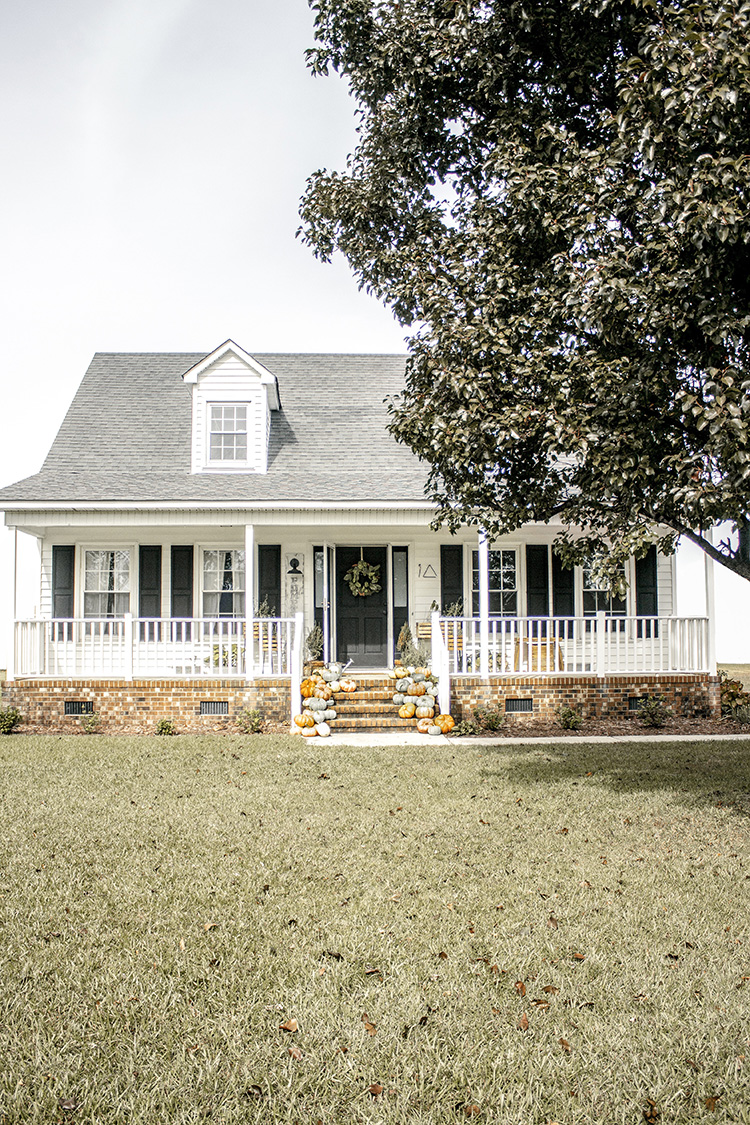
See “My Farmhouse Front Porch Decorated For Fall With Homegrown Pumpkins From My Garden”
Also See: “How To Care For Heirloom Pumpkins: When They Are Ripe To Pick And How To Keep Them From Rotting”
Want to save your pumpkin seeds for planting next year? Go HERE for my seed saving tips!


I love growing pumpkins. So fun. I had mice get into our saves seed stash and lost most of em 🙁
Thanks for sharing! And well done.
I live in Missouri, when is the best time to grow these so they will be fall ready?
Different pumpkin types mature at different rates. Check your seed packet maturing time and count backwards from the date you want to have pumpkins available (or your first frost date if you just want a harvest). The fairytail pumpkins in this article, for example, take 110 days to mature.
Yes! People just need to make sure to plant before their desired harvest date. Better earlier than later to make sure they are ripe enough.
When is the best time to plant for harvest in October
Thank you for your great post! You didn’t hold anything back. We recently moved to the Virginia mountains and I’ve started a raised bed garden. I’ve always wanted to grow pumpkins. There is a “Pumpkin Patch” about a mile down the road That grows the usual jack-o-lantern types but I’d like Caspers and Baby Dolls,etc. too! So here goes. I’m so excited. I will start today.
I absolutely adore this post. It has inspired me to do a pumpkin patch next year! Might be a silly question, but when you say you dug large mounds, then filled with the Miracle Grow soil, did you actually mound the soil up over the surface? If so, How high? Also how many seeds did you plant per mound? I feel like I have so many questions! Lol How far did you space each mound from the next? Would love a visual of you garden!