


Hey guys!
Today I am sharing my first blog furniture build ever. I’ve done minor projects, like planter boxes and picture frames, but NOTHING to this scale.
The first thing I wanted to tackle for my new home, was my desk area. I’ve spent months planning and dreaming about it (Want proof? See my Pinterest board dedicated to Everything Workspace, HERE) I think I have totally settled into my style, and yes, it incorporates my signature color, tealish-turquoise.

Don’t let this project intimidate you one bit.

Anyone can do it. Honestly, this furniture build requires only the most basic building tools.
Here is a random super weird thing I noticed: 2×4″ boards are actually 1.5×3.5″ boards.Why on earth do they round the board sizes up? Anyhow, here is the cut list: All the AMOUNTS of boards and cuts are in UPPERCASE, and any sort of dimension is in numerical form, to hopefully eliminate confusion (or in my case STRESS at looking at way too many numbers! I mean, I’m done building this desk, but looking at all those numbers makes me feel sick! Haha!) and the number of boards needed is separated from the cut needed by a red | symbol. Boards for the legs: -EIGHT 8 Foot Long 2×4″ | Cut into SIXTEEN 31″ long pieces Boards for the under desk support: -ONE 7 Foot Long 1×4″ | Cut into FOUR 19 5/8″ lengths Top Boards: (since the width we wanted was a 7 foot desk, we didn’t have to cut them at all) -FOUR 7 foot long 1×4″ boards -ONE 7 foot long 1×6″ board Boards for the Leg Supports: -ONE 7 Foot Long 1×3″ | Cut into FOUR 19 5/4″ lengths OPTIONAL: If you want shelves, then you will need the following for the shelving boards: -THREE 7 Foot Long 1×4″ | Cut into TWELVE 20″ lengths -ONE 7 Foot Long 1×6″ | Cut into THREE 20″ lengths Boards for the Shelf Supports: -TWO 7 Foot Long 1×2″ | Cut into SIX 19 5/4″ lengths

Okay, I did take some project photos… but I ended up deciding to do this one via blueprints… because the details won’t get lost in my messy garage. So first, double up your 31″ 2×4″s. You want to end up with 8 legs. We just nailed them together with HUGE nails (as illustrated above.) These babies are solid and aren’t going nowhere.

Next, take your 19 5/8″ “Desk Support” boards and screw them onto the legs. You can add more than one screw per leg if you like, but don’t add too many, as we will be screwing on top of this Desk Support Board.

Repeat above step until you have 4 leg sets.

Make sure your first board is flush with the edge of the legs.

One Note: If you have cute or comfy office chairs that you are obsessed with using, I suggest measuring to make sure that they will fit in this 28″ gap before adding the inside legs. You will also be adding two 1″ leg supports later, so take into account where the legs would be (so actually measure 26″ for your chair space) You can always decrease the space allotted to the shelves and adjust the cuts so your chairs will fit.

Screwing them in like this minimizes how many screws are visable from the top.Also, four of your top boards are 4″ wide, but one of them is 6″. Plan where you want that 6″ board to go. Personally, I placed it as #2 to the front.

You can always sand the edges down if they are a little off, but make sure you didn’t leave any huge gaps in between boards that might cause it to be the wrong width.

Add your supports. This part, while not super visually stunning, is an important structural step. You don’t what your desk to be wobbly, or un-level.

Here is a glimpse of what the desk looked like before adding the shelves… and everything else! If you don’t want shelves, skip these last steps, but if you do then build away!

The boards running across will act as shelf supports.

Here’s a behind the scene with my two helpers. Okay, one of them was just pretending to help. Guess which.

And you are done building it! I did sand it all down really well, especially where the top meets the legs, as I wanted it to be seamless.

Doesn’t it look awesome? You can fill in all the nail and screw holes in the wood with wood putty if you like. We kept it as is because I like character (my excuse for being lazy, haha!) I think I may fill in the ones on the top boards eventually, but we will see.

While I love the natural wood look, I did do some “distress staining.” I will share my super cool method for this some time soon! I think it’s a perfect cross between beautifully aged barn-wood and driftwood.

So there you have it! One gorgeous desk for under $80. It’s such a simple DIY Desk, but it has SO much rustic charm. I am in LOVE!

Notice our complementary bookshelf. I’ll be sharing the “how to” on that beauty soon.
I love love LOVE how simple it was to build!


I think your desk and shelves turned out wonderfully! I love your decorating style. This motivates me to try something similar in my house.
Please DO share your staining method. I love the look you achieved! Well done!
Thanks Tiffany! So glad you like it! I will definitely share the how to on the stain. Honestly, it's super easy and much faster than real staining too! XO Hannah
Looks fantastic!! Can't wait to see how you did the distressing, I have a couple guesses! Isn't it SOOO satisfying to see the final product? I was really regretting even starting my dresser refinishing project but I'm so glad I stuck with it because it's such an improvement!
I know, right? I was so sick of staining by the end of all these projects. Haha! But I LOVE the result! Have a lovely day Cathy!
This sounds so cool and all, but I just got a desk from my aunt! Before, my desk was a table and I'm sure I would've done this if I hadn't gotten that.
Your desk looks great, so warm and welcoming to read or create something on it! Love it and love your other works, you are very talented and should be thankful for it! :))) With love.. <3 <3 <3
Wow! I love the desk and love your beautiful touches too! So glad to have found your blog, I'm a new fan!
Sweeeeeet. Just love the style and your great directions.
wow, loved it! Nice job! What type of wood did you use for this project?
Hi Cilene, I'm pretty positive it was all pine. Hope that helps! 🙂
Hi Hannah! Thanks it does help 🙂
The reason for the difference in dimensions is when the wood is treated it shrinks. It's initially cut in the 2×4 dimensions then shrinks while being treated.
Wow, you really made that look easy. I'm just starting to learn how to build things, and after reading your instructions I think I could do this! LOVE IT!
So glad it's helpful! And yes, it is a totally doable project for anyone, I mean, we didn't even have an electric saw when we made it (we've upgraded from pure muscle since, lol!) XO
Hannah, I LOVE your desk, it is so beautiful! Your staging and photos are amazing too, LOVE!! Pinned, I may have to do this one, I have been thinking on how to do a desk area in my living room for a while and this is perfect!
Thanks Mindi! That means so much to me! 🙂
Hannah – the desk is fantastic. It is creative and has such a great rustic and natural look. I've been waiting for your plans on how to make the matching bookshelves. Any change you can share those? I hope to hear from you soon.
I will put that on my list to post soon! I'm so glad you like them both! XO
I believe the wood isn't actually 2×4 because of the milling that happens. From wikipedia – For example, a "2×4" board historically started out as a green, rough board actually 2 inches by 4 inches. After drying and planing, it would be smaller, by a nonstandard amount. Today, a "2×4" board starts out as something smaller than 2 inches by 4 inches and not specified by standards, and after drying and planing is reliably 1 1⁄2 inches x 3 1⁄2 inches.
Thanks! XO
Thanks so much Hannah! Your desk looks so amazing we are actually building it now for our home. I have one question about the instructions regarding the shelves:
You mention that we screw the pre-cut shelves into place. Does that mean we take the TWELVE 1×4 20" lengths and screw them into the shelf supports with one of the 1×6 boards going into each shelf support similar to the top boards?
Also, you stained after it was completed, correct?
Thanks again!!
Yay! That's so exciting!
While you could do the shelves that way, we actually just used some thicker shelving boards. And yes, I stained it afterwards. Hope that helps! Send me a picture after you finish! XO
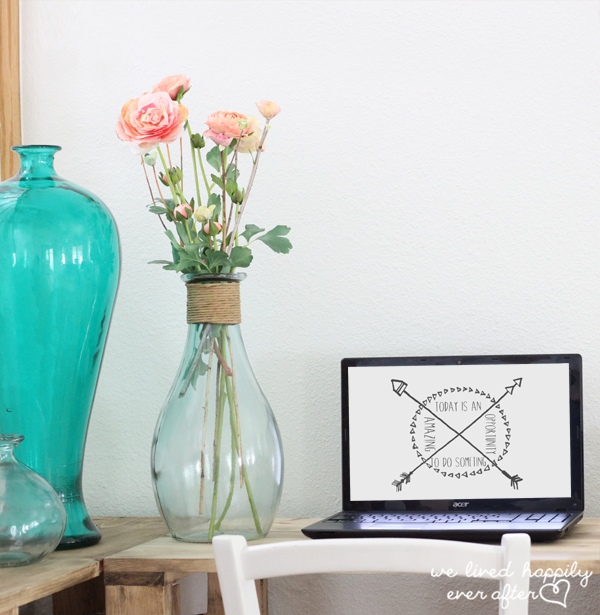
I absolutely love your decorating! This may be a random question, but I noticed the flowers weren't in water. Are they paper, or did you find them somewhere? They are so pretty!
Yes, they are paper flowers that I made (using real dried out flower stems) Here is the tutorial: http://www.welivedhappilyeverafter.com/2014/03/pink-flowers-real.html
Boards for the Shelf Supports: -TWO 7 Foot Long 1×2" | Cut into SIX 19 5/4" lengths –
What do you mean by 19 5/4"???? 5/4 = 1 1/4. So would the length be 20 1/4?
i think she meant 19 5/8 (since the 1×4 under top supports are that same length)
What an amazing room and such a smart project!
My son wants to build his own computer desk and this is exactly what he is looking for. Thank you for posting this.
Did you happen to ever post the instructions for the bookshelf? Looked on your site but can't seem to find. Would love to see a how-to!
I will be adding plexiglass to the top to give it a finished look. My vanity on one side & a mim office for my husband, this is gonna look so good in our bedroom
Did you ever post the book shelves, I am interested/
Hello! I, too, would love to see your tutorial for the bookshelves. Please, please post soon! The desk is awesome!!
Love your vanity and i am gathering my supplies to make it. About how many screws did you use and how long were they?