


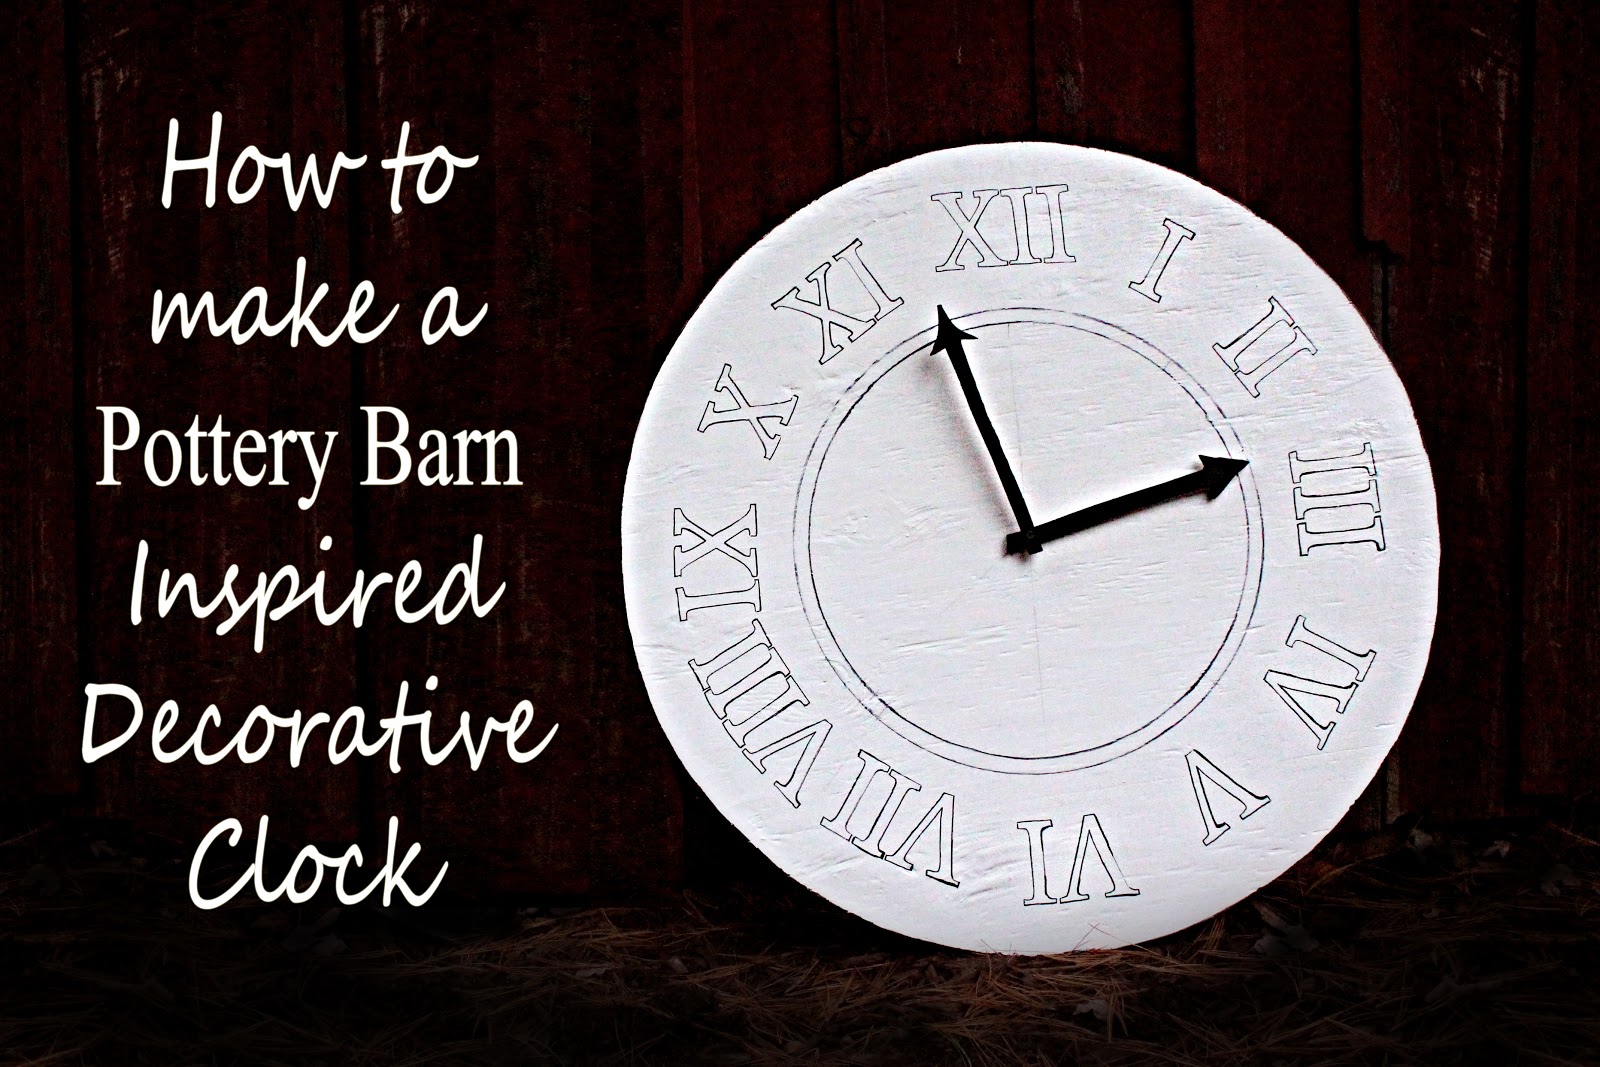
I’ve come across several great clock tutorials based off of the beautiful Pottery Barn Clock below.

I just had to make one myself and wanted to share it with you all!
For this project, you need:
- A board (mine was about 3×3′)
- Two paint sticks
- Screws & Nails
- Jig Saw (they are only around 20 bucks!)
- Paint
- Paper (to use for stencils)
- Tape
- Sharpie
- A cute baby to sit on your clock!!!

Okay, that one isn’t absolutely necessary. 😉
My first challenge was to create a perfect circle. I didn’t want to guess with that. Since my board wasn’t a perfect square, I measured the shortest side and subtracted an inch to give me room to cut it. I marked where the center would be base off of those calculations and drilled a hole for my nail.

Since my board was only big enough to make a 36″ clock, I taped my paint sticks together to measure 18″ (half of however tall you want your circle to measure) I then drilled holes on both ends of my paint sticks. Next, I inserted my nail into one of those holes and into the pre-drilled hole in the center of my board.

You want to be able to turn it in a perfect 360 circle.

The hole at the other end of the paint stick allows us to insert our pencil tip in and create the perfect circle!

It’s easier than it may sound!

Then my wonderful husband used the jig saw to cut it out for me. One tip is to go slow with this!

Here it is all cut out!
If you don’t have access to a jig saw, you can always just do a square version of the clock like in the Pottery Barn version.

This is it painted, dried and baby approved!
June was always super curious about what mommy was doing… and yes, she likes to just wear ONE sock. 🙂

These are the letters I used. I printed them out, then cut them out perfectly.

I wanted to make sure I aligned all my numbers in order and that they were correctly spaced (and I didn’t want to accidentally draw one upside down!) so I sketched out a quick sample, drew a light cross down the middle of the sketch and the clock and stuck the note in the center so I could reference it at any time!

This is the method I came up with for letter transfers onto signs. It’s a reverse Stencil. It is SO much easier than anything else I have come across. All you do is tape the very top of your pre-cut letters where you want them, and then trace on top of the edges of your letter! As long as your cut out stencil was perfect, you will get a perfect, accurate outline. It’s so easy, I don’t know why I didn’t think of it sooner!

Don’t you love my little curious helper’s hands? I just had to use this one because of how cute it is!
Using the same paint stick circle technique, I created a circular center under my roman numerals. The only difference was the length of the paint sticks. I only used one paint stick this time.

To get two perfect circles you can make the stick have a shorter radius by making another hole for the nail or screw in the center.

Using the side of the sharpie, I antiqued the edges of the outside too.
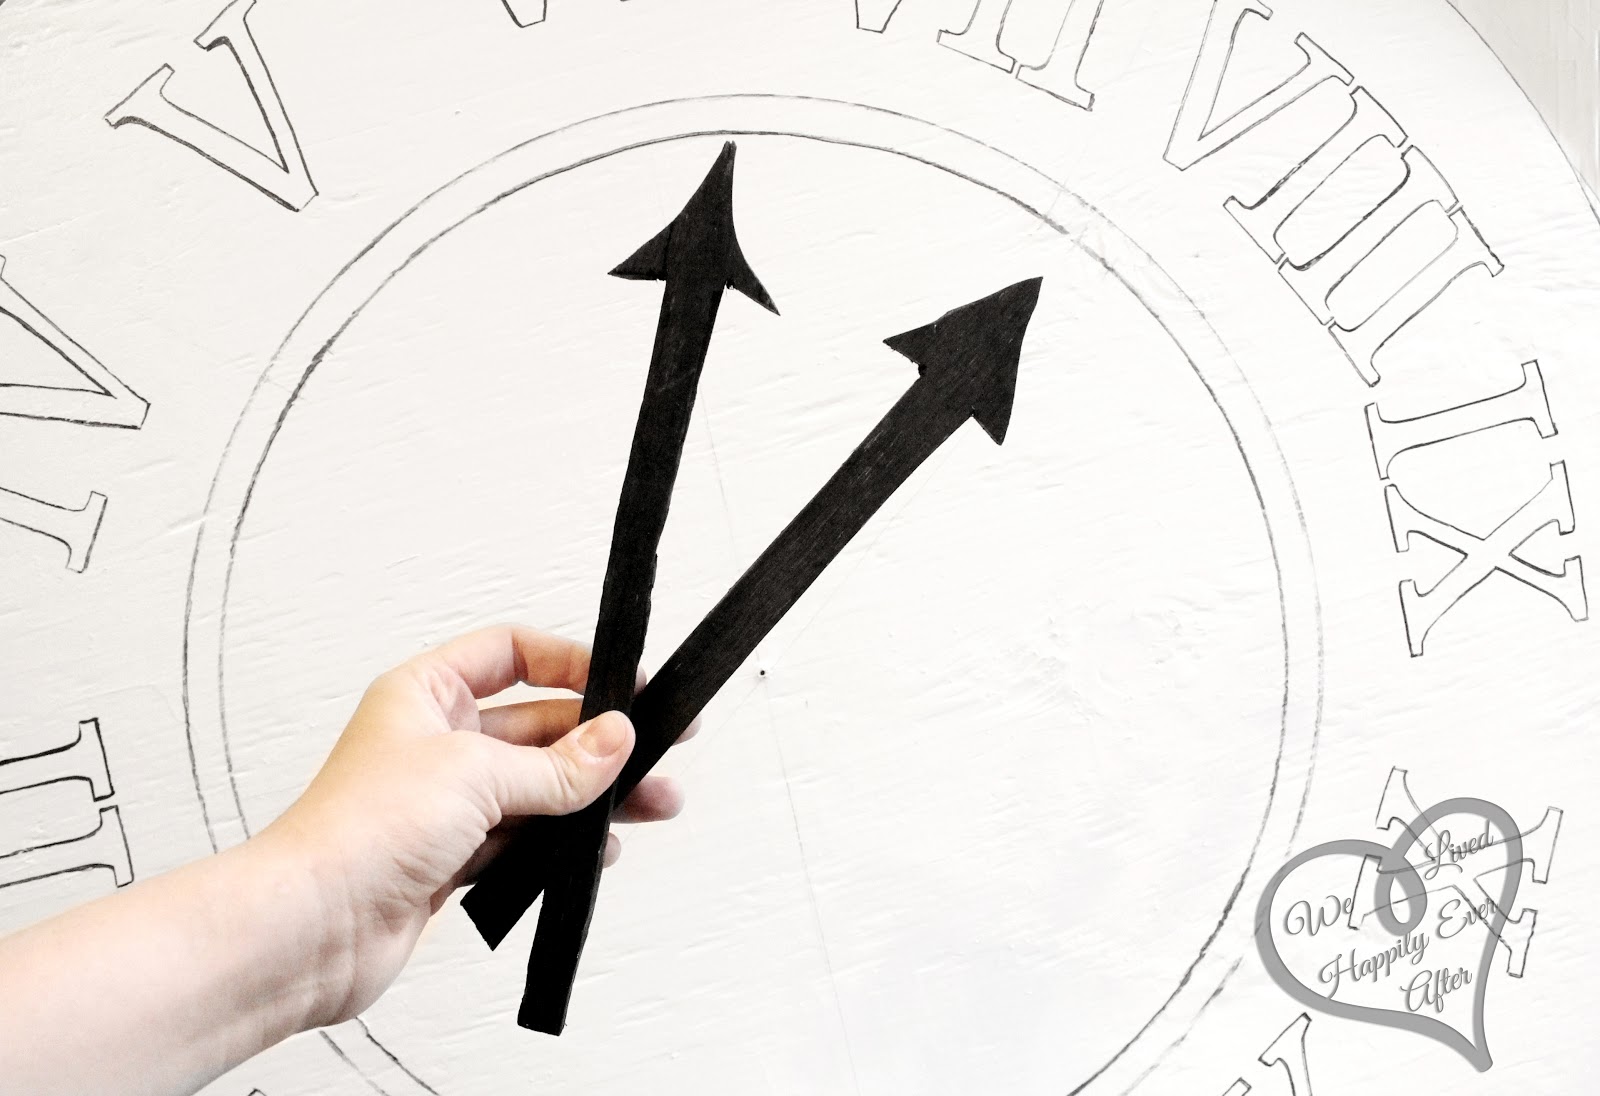
I cut some arrows out using the jig saw, and then colored them black with my sharpie (I love those things!)
Lightly drill a hole into both of them, stack them with their holes aligned. You know, that hole we’ve been using for all those circle steps? Yeah that one… Screw them into that hole.

I used this brilliant idea of using a soda pop tab from Apartment Therapy. My screw wasn’t big enough, so I had to use this circle thingy I found in my husband’s tool box! I’m so construction savvy! 🙂
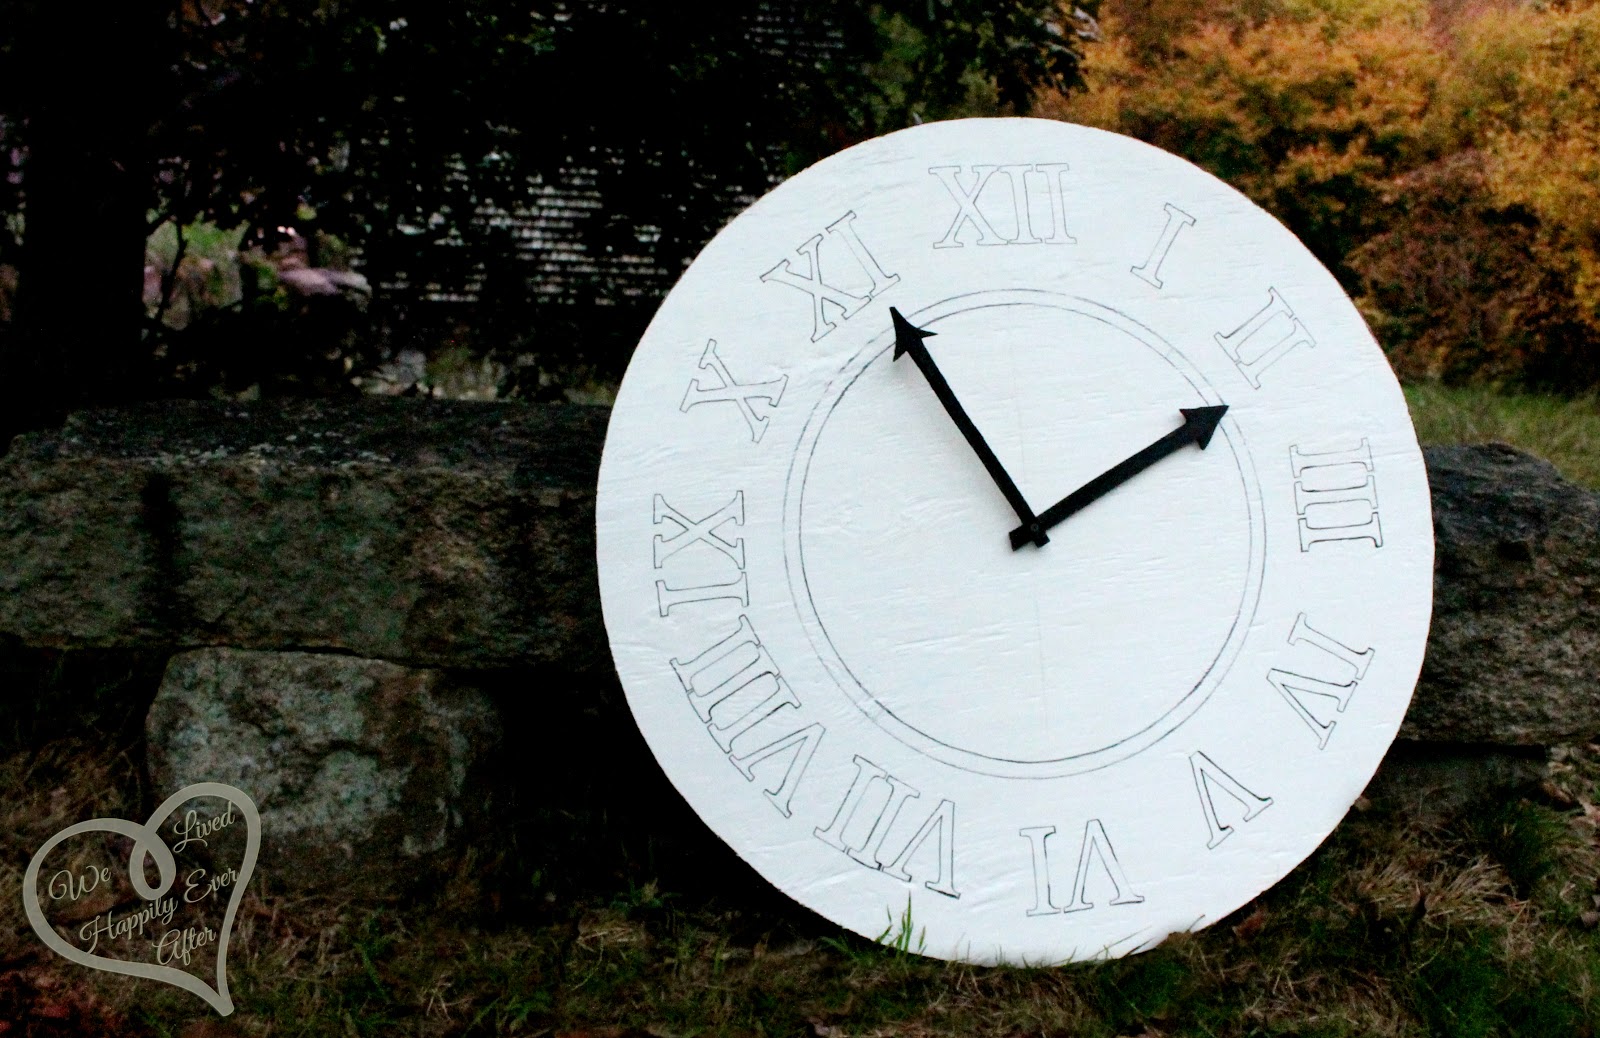
The hands don’t move like a regular clock, obviously, I just wanted it for decoration. But you can always put it on a special date or time in your life (like your anniversary, the time you got married, first met, or your child was born- that’s what we did!)


That is so awesome Hannah! I love Pottery Barn decor! June adds an extra cute touch.
Thanks Naomi! I know, she just wants to be involved in everything I do! 🙂
Hope to see you soon!
wow, I don't know how you do it Hannah. it looks really, really awesome! 🙂 I love how it's pointing to the time Junebug was born!!
Thanks Grace! <3
Oh hat is fantastic, I love it! stopping by from cure for the common cold
Glad you like it!
Great looking clock! You've posted a good tutorial too, thanks (and your helper is way too cute!). I've got this linked to my clocks post too today, for beautiful DIY clock makeovers and ideas!
Thanks!
<3 Hannah
Love the clock but the baby is the best, she's adorable.( I'm a nut for babies. Maybe that's why I had 5 of them.) Great tutorial also, along with cute hubs. I came over here to your blog from Inspire me Heather for the clock redoing? Think that's how I got here. When I keep clicking on links I get kinda lost. Now where was I? Happy weekend
Awww! You just made my day. 🙂
I know, I have the cutest baby (who totally takes after her cute daddy 😉
<3 Hannah