


When designing June’s Playroom (see the whole room reveal here), I had this nice bright window to do something with. I didn’t want curtains because I wanted to keep the nice natural light coming in and it already had blinds. But I didn’t want to leave it naked… that wouldn’t look nice at all.

That’s when I came up with the idea to make a garland of yarn balls. I’ve seen people use them as light fixtures, and decorative accessories, and since my little girl LOVES balls, I knew this would be the perfect alternative to curtains.

So here’s the really easy method I used to make this adorable garland for June’s room.

You’re going to need:
Yarn or string…

…. Glue (any type of school glue will really work fine)
a bowl,
water…

… and some Balloons. I used standard size balloons, but you can use whatever shape or size you want. Circular water balloons work really great (I’ve used them in the past to make some yarn balls for Christmas ornaments)

I wanted my balls to be perfect orbs, so after tying them off, I used a small elastic rubber band to tie off the top too so that they wouldn’t be lopsided due to not being inflated all the way.

Now you need to lock yourself up in a room (away from your toddler who wants to steal all of your balloons!) and blow them all up.

I’ve found that gently tying your string onto the end of your balloon helps keep your string in place while you are wrapping it.

Now for the fun, time consuming part…. wind your sting around your balloon over, and over, and over again until you have covered it completely.

Now you are going to mix your water and glue in an approximately 1 part water 2 parts glue ratio. Don’t bother measuring it… that would be way too messy. Just pour it into a bowl and then mix it really well. If you don’t mix all the water into the glue evenly, you are going to have balls that collapse when you pop the balloon because they didn’t get stiff. Once your mixture is combines, dunk your balloons fully into it. shake them off a bit but make sure the strings are completely soaked in it.

Now hang them to dry for 24 hours or until completely, totally dry and stiff. I hung them on my shower curtain rod with tons of newspaper under them for drips.
If, for any reason, some of your string doesn’t feel stiff enough, go ahead and repeat the dunking process with the glue and water and be patient all over again and let them dry.

Now that they are dry you get to pop them!

The balloon might slowly deflate, or it may pop into several pieces. Carefully take it out through the holes in your ball. You can always enlarge a hole and then re-position the string once you are done removing it.

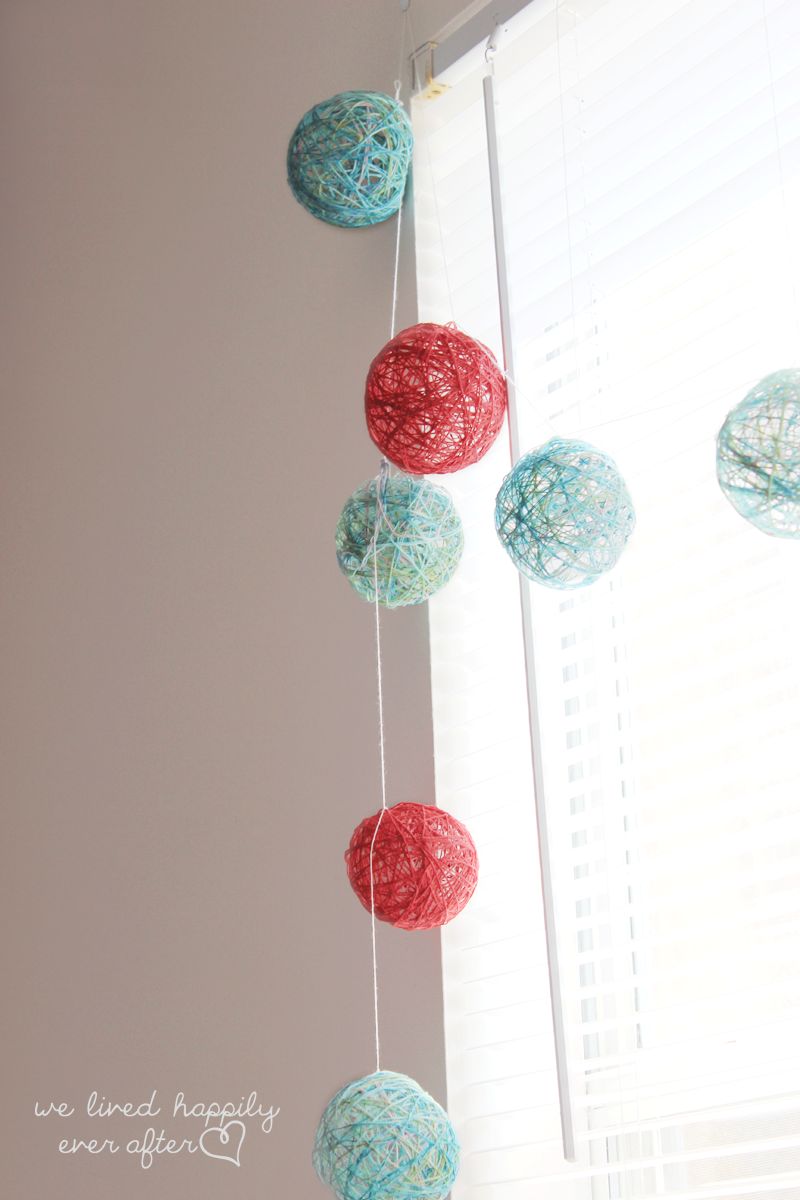
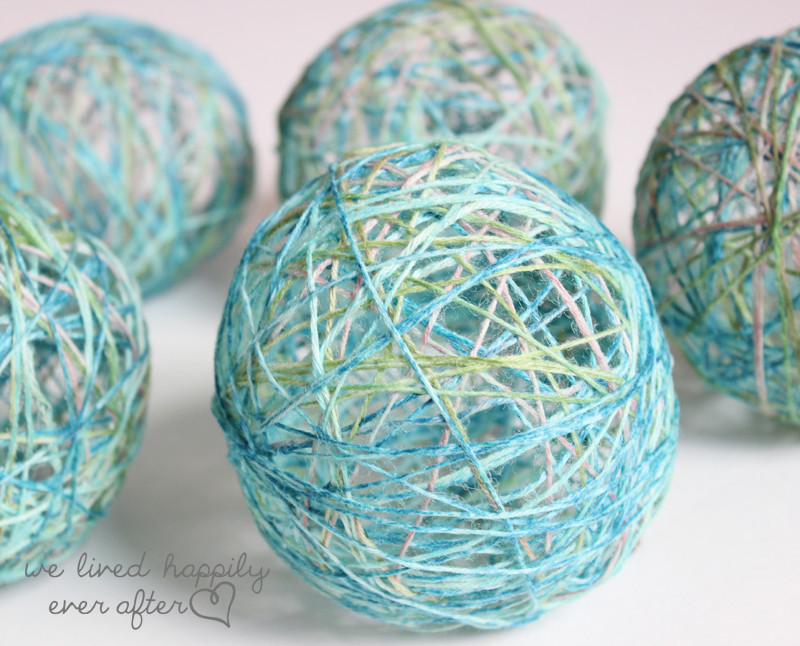
Now you have some super cute balls to decorate with! You can pile them into a basket, or you can hang them as a garland like I did.

To make my garland, I inserted some string into my balls, tied them off and then repeated with the next ball.

I love the pop of color they bring into the room.

They were a “ball” to make! 😉
June is pretty crazy about them too. The first time she saw them she ran up to them and pointed, saying “Ball, ball, ball!”
I’m considering adding a string of lights to the garland too. We’ll see. 🙂

Yarn Balls 6.50
$6 for yarn @ $3 each
$0.50 elmers glue
Make sure to check out all the other posts in this series!


Do you just roll your yarn balloons around in the glue mixture?
You can, it's a little messier that way, but I've done it both ways. <3
I love these and your whole playroom is just adorable! Love how you made your balloons round too… great idea!
Aww! Thanks! <3
I REALLY like this! What a clever idea, you are always thinking of things that are very unique and well thought through! I'll have to try this sometime!
Thank you for your sweet comment! You should try it out
So, I tried this yesterday and I could not get my balloons even semi round enough to tie off the little nipple thing with a rubber band. Is there some secret to not having the nipple go to one side or another?? 🙂
Were you using full sized balloons or water balloons? If you were using full size balloons then you just blow it up to the approximate size you want and then tie it off, then rubber hand it to create the circle. That was the only "severer method" I used. Lol.