


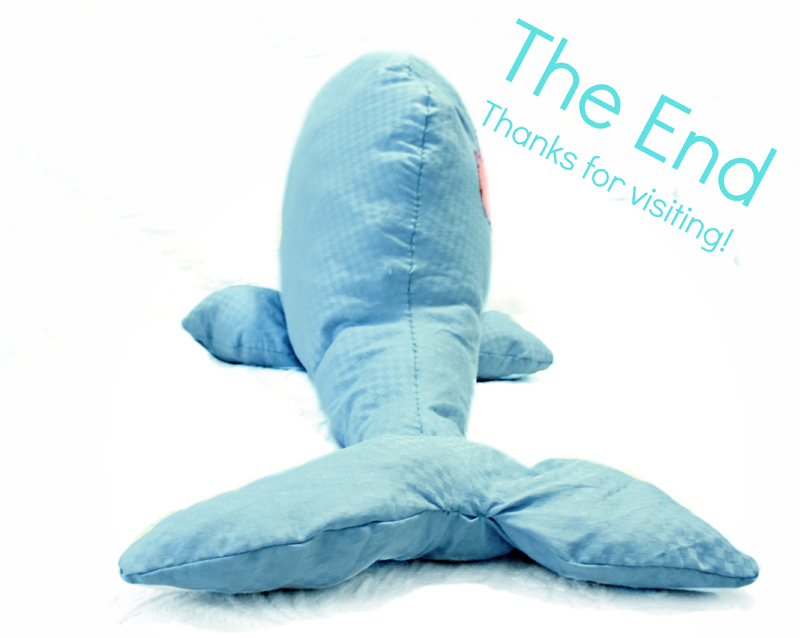
Meet Walli!

She loves to splash around and have a blast!
Okay enough with the rhymes.
Here are the instructions to make this adorable whale, which can also be used multipurpose as a Pillow Pet. The pattern download is at the bottom of this post.
Please, don’t redistribute or sell this pattern and/or items made from this pattern and tutorial. I reserve all rights to my patterns.
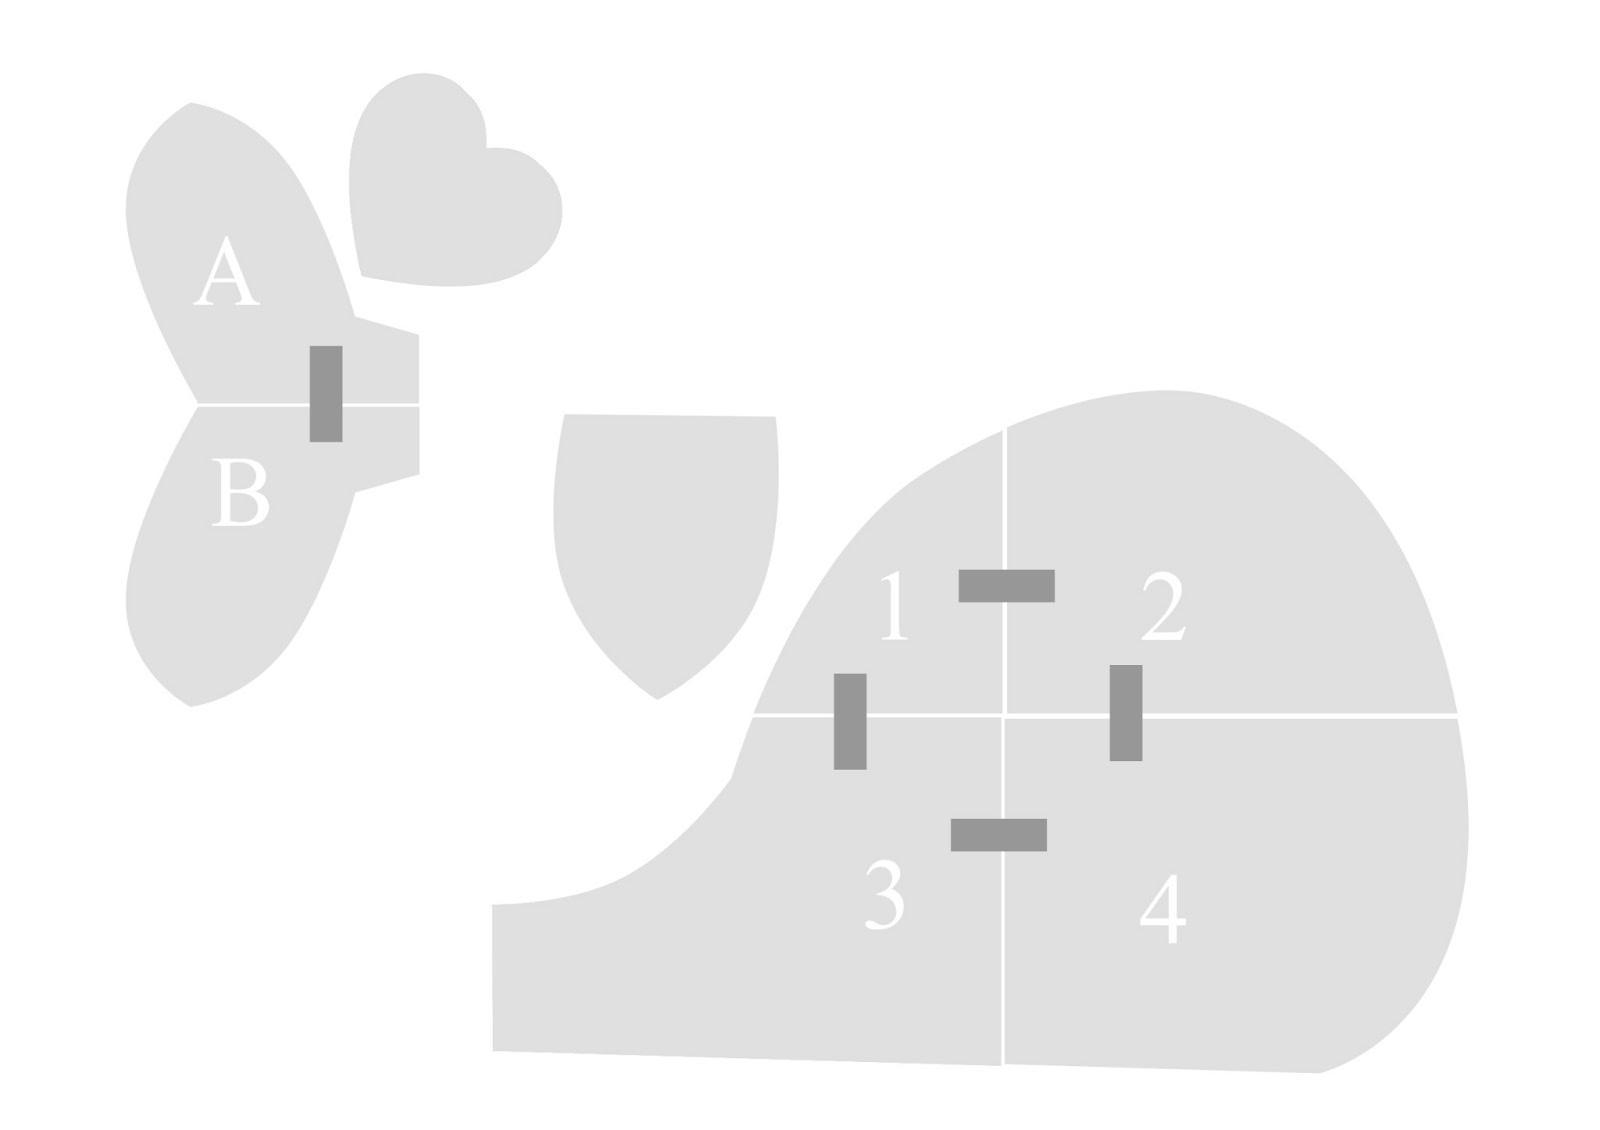
After printing & cutting out your pattern pieces, you need to assemble them as illustrated above. Tape the pieces connected by the dark grey strips.
1. Cut out the pattern (4 flippers, 2 body pieces, and two tail pieces, optional: 1 heart)

2. Sew pieces together (leaving part of the underside of the tail un-sewn to stuff)
3. Stuff.
4. Hand stitch opening.
5. And then just sew on heart patch & eyes!

What child wouldn’t want this adorable whale?

Walli jumping over Baby Girl! Haha!

This was probably the easiest stuffed animal I’ve made.
Well, that’s it. Hope you enjoyed the tutorial and that it inspires you to make your own stuffed swimming friend!
This Download is totally free to all email newsletter subscribers of We Lived Happily Ever After. Not a member yet? See my steps below to join.

HOW TO DOWNLOAD:
All Printables are exclusive to my Newsletter Subscribers, and have a password protected link. Follow the steps below to access password for free downloads.
[convertkit form=5061440]
- Subscribe to Email List.
- Check your email to Confirm Subscription.
- Press “Confirm Subscription” & you will receive my Welcome Email with the Master Password.
- Copy the Master Password.
- Press the “Download Here” button on each post you want to access the goodies.
-
You will be directed to Drop Box. Enter the Master Password & start downloading.
Follow me on Instagram @welivedhappilyeverafter for new freebies.


They are both adorable!
They both just make you want to cuddle! Great photos!
Thanks!
CUTE!!!!!!
Thanks!
Super Dooper !!!
🙂
where do you find the pattern???
I made it myself.
If you are interested,I am going to be putting up a to-scale pdf print out pattern up on my Etsy shop next week. (It will be around $3.99)
Here is a link to my Etsy shop with other available patterns:
http://www.etsy.com/shop/HappilyEverAfter7
<3 Hannah
Oh my goodness. This is absolutely fabulous. So cute; can't wait to get started on the dino and whale!
i dont sew very well….. but im thinking of learning!!! i love this idea and the whale is ADORABLE!!!
😀 Omg! I've been looking for, like a really cute whale to sew, 'cos as we all know whales are pretty cool and plush whales are, like adorable. Can't wait! 😀
So glad you like it! I am seriously in love with how this whale pattern has turned out! <3
This is a silly question, but I was wondering if you could explain how you attached the tail to the whale? I'm new to sewing, and I just can't figure it out!
Sorry the pictures aren't more detailed.
I'm going to walk you through it to the best of my ability. Before sewing the bottom part of the whale body (the tummy) together, I laid it out (as illustrated in the photo with the tail step, with the hemmed side facing the table. Next, place the tail on top (the tail should be turned right side out with all the sewn hems inside), but instead of doing it the way the photo illustrates, make the tail face the other way (with the end facing towards the front of the whale body) The tail should be centered in the middle of the body piece. Now sew the ends together, making the whale body piece wrap around the tail until you have a circular opening connecting the two pieces of the whale.
Hope that makes sense. I think I really need to redo this one! 🙂
Let me know if you have any other questions!
Love, Hannah
Hey there! I really love this 🙂 But I don't really get how the flippers are attached. Thanks in advance for answering! 🙂
Im sorry its so vague. ill try and put up a new, more detailed tutorial soon!
First, you should see the two whale body pieces together (minus closing up the tail)
Next , sew the two pieces of fabric for the flippers together leaving the straight edge unsewn, flip inside out so that the sewn seams are now inside.
Now, cut where the flipper should go… I suggest 3-4 inches up. And cut it as wide as the flippers are.
Next, as illustrated in the first flipper photo, pin with the seam basically facing inside away from you. Once you finish pinning both of them, turn the whole whale body inside out again and then sew the flippers on… It may be a little tricky for some people to do that part on a sewing machine, but just take it slow.
Hope that helps!
And like I said, it's on my list to "redo this tutorial. 🙂
<3 Hannah
Hey! I just dropped by to say thanks for the tutorial! <3 I made a whale for my niece as a Christmas present and she loved it ^^
http://i1273.photobucket.com/albums/y404/puppysauruss/2013-12-26100746a_zps8c14e3c3.jpg
http://i1273.photobucket.com/albums/y404/puppysauruss/IMG_0127a_zps571577f2.jpg
http://i1273.photobucket.com/albums/y404/puppysauruss/IMG_0128a_zps6e866f96.jpg
I made it a little bigger, and unfortunately proportions went a little off in my whale's case (>.<"), but Julia didn't seem to mind in the end hehe
Thanks again!
~Ania
You just made my day! It turned out great! Thanks for sharing Anna! <3
OMG! I just made this for a friend and it is adorable! Thanks so much for sharing the pattern!
Awesome! So glad it turned out! Feel free to send me pictures via email or on my facebook page! 🙂
Hi Hannah, I wanna thank you for this great pattern. I was looking for something to do for little boys, cause I´m not sure enough about bunnies and Teddys for them, I really gonna try this. Tx that is free cause I´m doing stuffed toys for homeless kids.
God bless you,
Valeria, from Argentina
Excuse my horrible english 😉
I am so glad you are going to use my free pattern! God bless you as you are blessing those homeless children! Your English is great! 🙂 XOXO
This is absolutely so adorable!!! Thank you for the free pattern! I've just begun to start learning to sew (got my first machine about a week ago), and have been looking for easy patterns to try! I'm going out to buy fabric for this tomorrow and was wondering about how much fabric was used for this! Thank you in advance!!!
-B
I would suggest a yard. Have fun! 🙂
I whipped one of these out in a little over an hour yesterday afternoon to give to my best friend's at her baby shower. So easy and adorable! I will be making several more for my niece and nephews! I used snuggly flannel and didn't add any eyes, my mom and I agreed that we liked the "soft" feel of it without the eyes, but I did add a red chevron heart. I cannot wait to try your other stuffed animal. I plan on (eventually) posting a photo on my blog and I'll credit you with a link here, I want everyone to know where this creative pattern came from! Thanks again!
Hi! So, I really want to make one for my niece, how much fabric will I need?
Thanks!
Tracie
1 or 2 yards should work. Enjoy! 🙂
i need something for my school prject and thought this would be adorbrable, What sizee of shirt would need how much polly fill would i need i need this awnserd as soon as possible i have it due next tuesday thanks
I used a robe for the fabric myself, so you might be able to use an XXL (or XXXL) tee shirt. You can always trim down the pattern to make sure it will fit on the amount of fabric you have. A big bag of Poly-fill should work. Hope that helps! 🙂
This was probably the easiest stuffed animal I've made. … storepetsteps.blogspot.com
The first time I made a mascot. I have two left hands to the needle and thread. But – I made it!
Look: http://wrzutapandy.tumblr.com/post/103453512611/cute-plush-whale-idea
i am a fshion design student , and ur posts give me a lot of inspiration .looking forward to more tutorials
Hannah,
I just wanted to say that I made this yesterday for a friend who just had a baby girl. It was the first time I made a stuffed animal and it was easy as can be thanks to your tutorial!
I made it a fair bit smaller so it is easier on the go and it looks absolutely adorable!
Greetings from Germany!
Awww! So glad you like it & that it was easy to do! XO
Oooohhhhhh!! So lovely!!
Thankyou for your patterns and tutorial.
I invite you to visit my blog, there you can find free patterns of my works.
http://www.fetambcor.blogspot.com
Kisses from spain!
Ema
Thanks for pattern, I sew the whale 🙂
I can't upload here a photo, so I'm sending you link to my google drive, where you can see it 🙂
https://drive.google.com/file/d/0B7g05FUfvFlvU1VTRGxpdlFVSms/view?usp=sharing
As you see my cat Purka loves all the stuff I made for my daughter 🙂
Kisses from Poland!
Olka
Hi! Thanks for the tutorial! Is there a redo coming soon? We're a bit stuck on the flippers and the tail attaching. Thanks!
nice